How to raise your photography prices... it's harder than you think!

Well here I am almost exactly a year from when I said my goodbye to Simply Actions. What a year it has been. Lots of personal growth, as well as professional growth. I have mentored 15 amazingly talented and beautiful photographers, I have had two very successful courses sold through the Milky Way Retreat (Maternity and Family) all the while servicing over 80 clients throughout the year. 2017 was a real roller coaster!


It is that time of year, when we are feeling maybe just a bit over-worked, under-appreciated and questioning about whether we should raise our pricing for the new year or not. I am not going to preach about how expensive it actually is to run a photography business, instead I am going to ask you these three questions:

At the end of the year do you feel completely under-appreciated and totally burnt out?

Or do you feel like yelling from the rooftops, "I am ONLY ONE PERSON!"?

Do you feel relatively happy with your work and clients, but want to make more money in the new year to build your business, but you are worried about people not wanting to book you any more?

If you answered yes to any of these questions please keep reading. I am here to help :) 

PLEASE NOTE: these following five steps I outline are some of the things I work with my students who sign up for my online mentoring - so if you are needing a hand through all this, click here for my holiday pricing!

53 (7).png

Before I get right into it, I want to explain why we are taking all these peripheral steps rather than just raising your prices. I explain things best I feel with analogies, and seeing as I have just recently experienced the wonders of manicures, I want to give you a scenario. At the beginning of 2017 I got a Groupon (an online coupon) to go to a nearby spa for a manicure. I went with a friend, and it wasn't what I thought it was, they had us in separate rooms, so we couldn't sit and chat, and although they did shape my nails, they just used regular nail polish and that was that. It was cheap, I wasn't upset about the service, but I wasn't dazzled by it. Then back in May I was going on a trip to Europe so I wanted to look and feel amazing so I went to a salon here in Montreal for another manicure. It was considerably more expensive. But I went in and was offered refreshments immediately. I was seated and then while I was getting my nails shaped etc the owner came over to say hello and ask how I was doing. Then the manicurist used a special gel nail polish that needed to be cured. As someone who is prone to chipping her nail polish before it even fully dries, having pretty nails that lasted a couple of weeks was amazing. I can tell you that if I paid the price I did for the second manicure and received the first manicure service I would have been pretty upset and felt super taken advantage of. The result of both appointments were exactly the same. I went in for pretty nails and received that both times. The only difference was the quality of service. And because the quality of service was so much better the second time I was very willing to pay triple the price. And I plan to go back to the more expensive place, and never go back to the cheaper one. 

Now imagine that in the context of your photography business. Your images are probably beautiful. But even if to a trained photographer of many many years in the biz your images have room to grow, it doesn't matter to your client, because your images have their favourite subjects in them, their children, or their family, or their newborn, or their wedding day. So the most important thing your client is paying for is service. This service is actually what you are selling! So to be able to provide the service that will justify you raising your pricing here are my five steps.

75 (5).png

Step One: Discover your why. 

If you are in the photography business to make easy money, sit down. It's not going to happen. You will burn out before it does. But if you are in the business of photography because you are compelled to for heartfelt reasons you have the strength and stamina to build a beautiful lasting business, as long as your work from your why. Here are some examples:

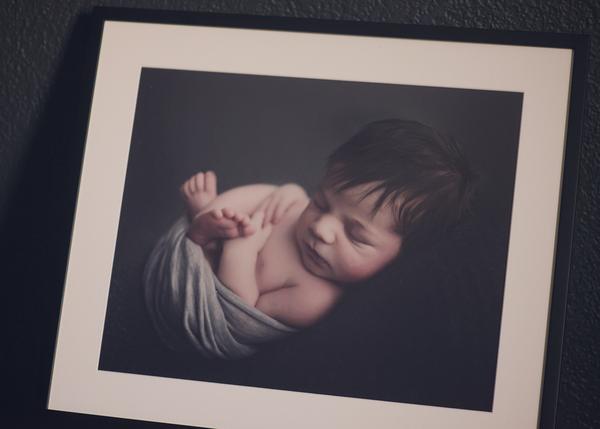
For me photography is about validating that love, whether it is for you family, child or for yourself. When you have those images up on your wall, and you see them everyday, you are reminded that no matter how tough life can be, you are loved and you love. 

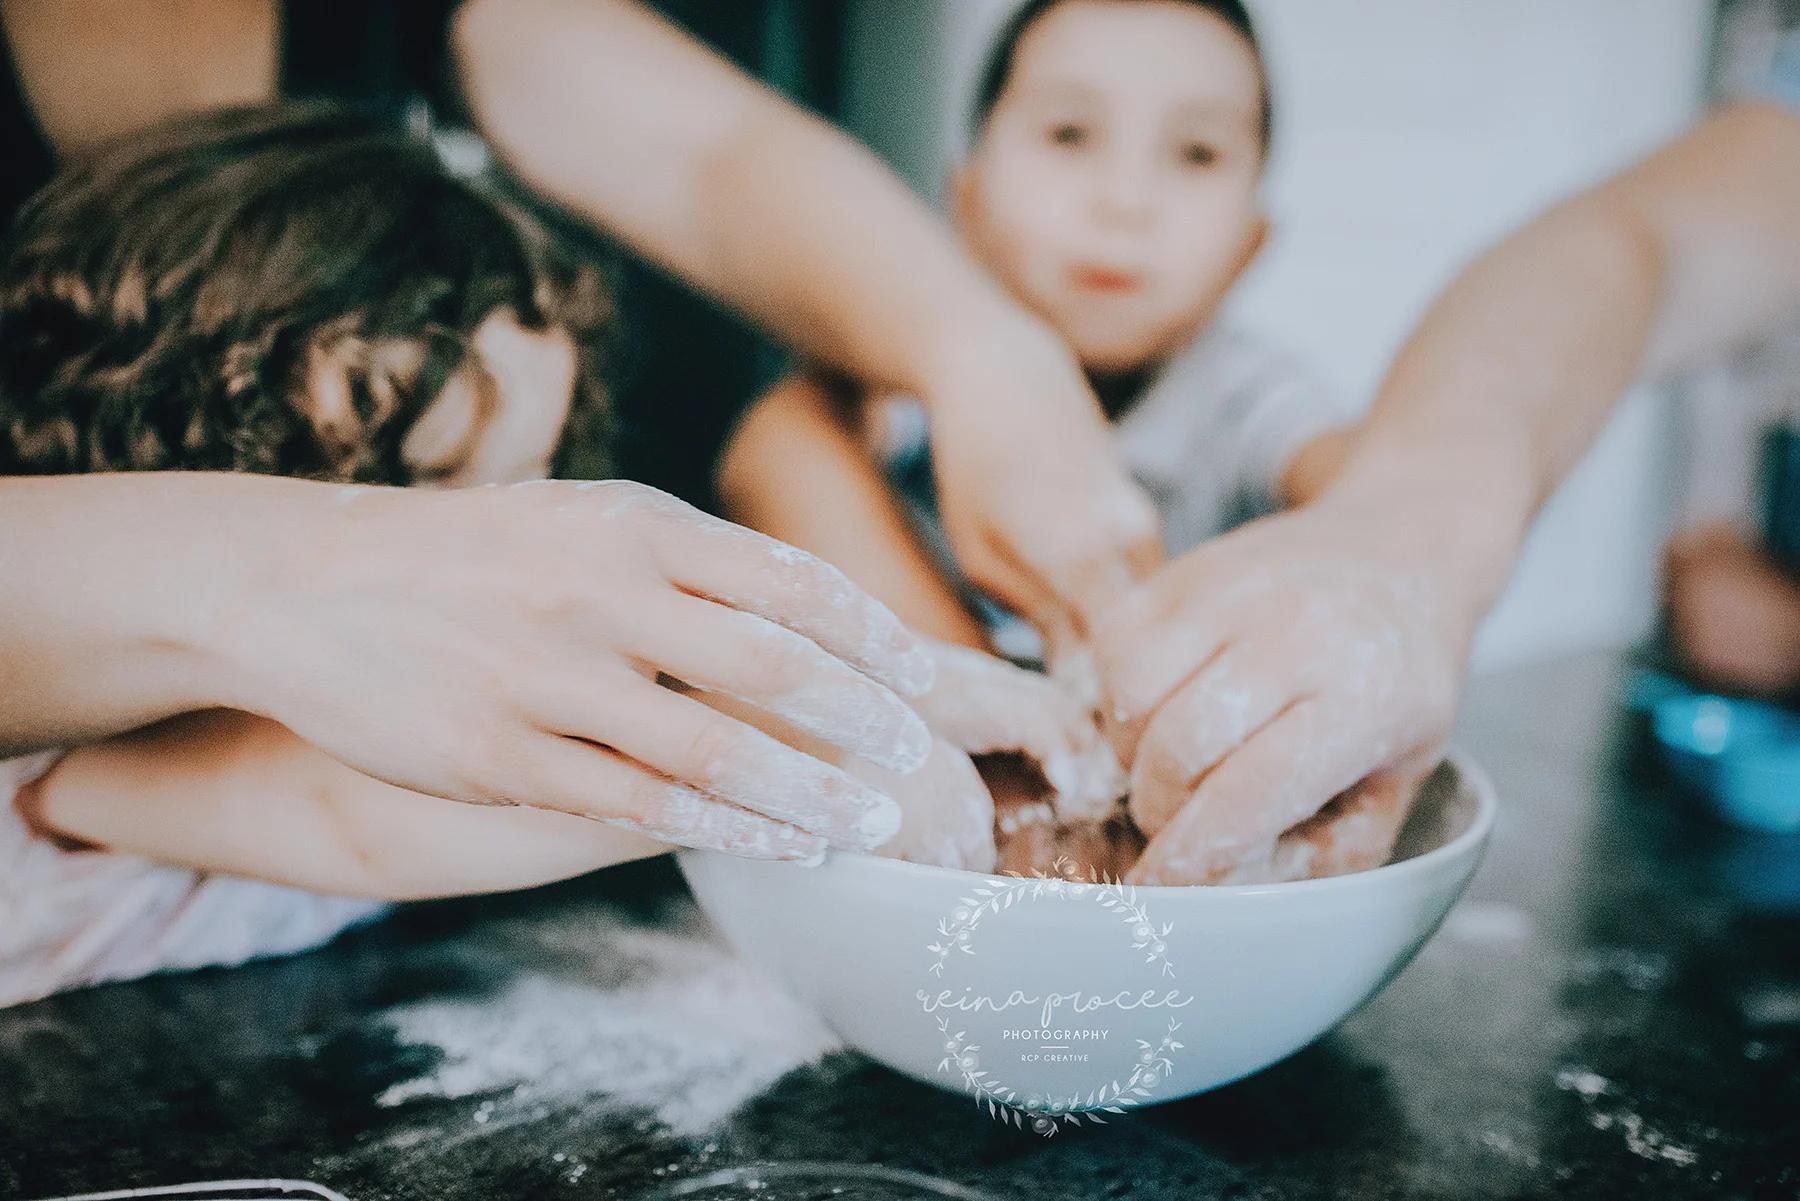
For a student of mine it is about finding the beauty in the chaos and mess of real life. Her images are of a lifestyle feel, but not the pristine uncluttered kind, she does not ask her clients to clean up their homes before a session, she zeros in on the connection amongst the daily clutter and it looks beautiful! It gives her clients the understanding that their lives are beautiful exactly how they are. 

For another student of mine, photography is about freedom. It is allowing her clients to feel free to be themselves and capturing the beauty of their love completely as they are. Authentically. 

35 (7).png


So find your why. Once you know your why, you know the true value of what you are doing. (NOTE: if you could only do ONE genre of photography for the rest of your life what that would be; really think about that. I know it is hard to narrow it down sometimes, but think about your why and what genre feeds that the most. It helps to have a very clear message of your why through the photography you do). Remember we are just talking about what you are marketing for, you can still say yes to different genres, but having one genre makes you come off as a specialist, as well as it is a clearer message to your potential clients. Find out what your why is so when your clients ask you about your pricing, you can explain to them the amazing and priceless gift you are giving them with every image. Not all who inquire will see the value in what you are doing, but enough will. Trust me. 

Step Two: Discover your Style

This is the toughest one to do. Especially when there are so so so many photographers out there, you wonder if you could ever stand out. How can you find a style that is solely yours and uninfluenced in a social media environment, where there are countless influences scrolling through your feed on the daily. So hard to find that focus I know. Here is my advice in finding your style:

- keep working on your technique, the better you get with the technical side of your photography, the easier it will be for your style to come out and shine. You will be spending less time in photoshop or lightroom trying to fix your in camera mistakes, and more time on playing with your images and seeing what you love. 

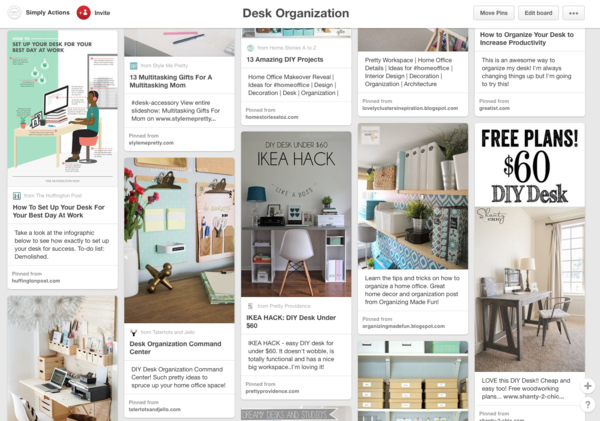
- your style will blend into your branding. It should match, and compliment. so what I tell my students to do is build a pinterest board. Put everything on it that speaks to their why or is truly visually appealing to them. Add in fonts, colors, clothing, photography and quotes that speak to you when you think about your clients and what you want to deliver to them, try not to think about what you SHOULD be doing, and just let your heart choose, use your WHY. Once you have done that, leave it for a few days. Then when you go back to it, look for commonalities, look for common denominators. This will show you more of what your style is, and will get the juices flowing on how you want to deliver your services to your clients. 

60 (5).png

Step Three: Website, GET ONE

I have had countless conversations with clients who have said when they decided they wanted a newborn photographer they went right to google. People don't instinctively think to go to Facebook to find a photographer, especially if they are a higher paying client, so if your Facebook page is up to date, but your website is not, then you have a problem. You want to be searchable on google, and you want your website to be beautiful and easy to use and to clearly share your message. If you need a user friendly site to build your website with I STRONGLY recommend Squarespace. It is user friendly and I have converted a couple of students to it and they are MUCH happier for it. Here are a few websites I built for students with Squarespace:

https://www.tripletenphotography.ca/

http://www.elizabethgleese.com/

https://www.bloomlightphotography.com/

and here is one I consulted on:

https://www.tammybouchardphotography.com/

If you would like more guidance on building a successful website, or would like me to build you one, please check out my online mentoring :) building you a website is a part of my holiday special pricng! :) Click here.

Step Four: Client Workflow
 

It is so important to guide your clients through the photography experience, and that might seem like a lot of work, but there are easy automated ways you can do that, so that the experience is seamless for them and not too time consuming for you. Here is the client workflow I use in a nutshell:

-Inquiry email comes in through my 17hats.com leads contact information which is embedded on my contact page on my website. I send them back a personalized version of my template response to the specific type of session they are looking for. This template lists out a general idea of what the session timeline will be from booking to delivery of images. In this email is the link to my welcome guide that has the same information but laid out in more detail as well as it has my full price list. 

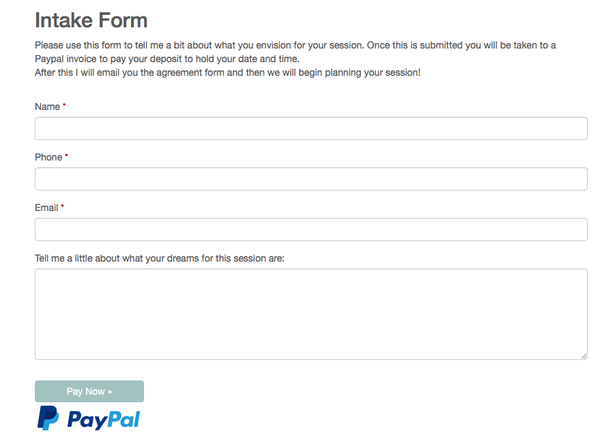
-They reply wanting to book. I send them my Jotform agreement form/contract which has the means to take a credit card payment for the session fee which I use as a retainer to hold their session date and time. This form allows me to get to know them through a few questions and also lets them know my studio policies. 

-About a week before the session I send them a Session Prep Information email with the date, time and location of their session along with any tips I can give them on what to wear and what to bring. 

-At the session I have an amazing time with them, we laugh, joke... if its a newborn session, someone gets peed on haha!! But there is no money exchanged at this part of the workflow, I want them to focus on the experience of the session free of monetary concern. 

-When their session is retouched and ready I meet with them either via Skype or in person to show them their images, go over the price list again and they make their final purchase for the products. I ensure I deliver them their product within the agreed upon timelines laid out in the agreement form/contract they signed. 

This is the workflow that works for me. Others do even more! They will deliver product with beautiful little gifts, some will do an in person pre-consultation, or go to their clients home to help design their wall galleries. Talk to photographers you admire, ask them what they do. Talk about it in supportive Facebook groups. You will be completely inspired. Just make sure you can afford to deliver what you would like to do, and price out the cost of each package delivery and include it in your costs when you are figuring out your pricing. 

18 (6).png

Step Five: Raising your Pricing - ACK!

Now that you have done all the other steps, you have worked up enough of sweat, passion and belief in yourself that your pricing shouldn't be too hard to raise.... BUT WAIT! What if your clients will not book you! OK, breathe. Your current clients may get sticker shock yes, but I feel it's important to be totally up front with them. Tell them it was time for you to start charging pricing with your business in mind, not with your heart. But the great benefits of it is that now you will have more time to treat them as amazingly as they deserve! In addition you can give them the option to book a session within a desired time frame without having to pay a session fee, or with a special bonus gift of their choice, to help ease the transition - for instance you can say, "If you book before the end of January, for a session anytime between now and June 2018 I will waive your session fee, or provide you with a free framed 11x14 print." Send this information out to all of your past clients via email. Facebook posts are RARELY seen, and if you don't you will be having this conversation over and over throughout the new year. 

Please note - not all of your clients will come back to you. Trust me it has happened to me... and it is heart breaking. But the great thing is that it leaves room in your heart for new clients who VALUE what you are delivering. You may find old clients will book when you do mini sessions, which is great! 

Another thing to note - You will begin to see more people saying that they are not interested, you are out of their budget, or just plain not responding to your inquiries... it's ok. You don't need as many yes's to your pricing as you used to get. When I went from shoot and burn to running a boutique business, I made the same in one month with my new pricing and three clients, as I did in one month with 26 clients with my old pricing. INSANE!!

Last and MOST important note: MAKE SURE YOU ALWAYS DELIVER YOUR PRICING TO YOUR CLIENT BEFORE THEY BOOK. This is why I give it to them in their inquiry email. You need to be upfront with every client, ALWAYS. When you are clear and upfront, your client knows what to expect and you know that if they try to twist things on you, you have a paper trail showing them that they were informed from the very beginning what the pricing was. Doing it this way protects your client from getting a nasty surprise and you from having to deal with clients who feel a bit duped. 

10 (9).png

Here is a link to a great article by the Marketog on how to figure out the math around your pricing. It might look intimidating at first, but I believe she has a workbook you can fill out that will do the math for you as well :) https://www.themoderntog.com/photographers-pricing-guide-business-projections-and-calculations/

If you are looking for a little more help with all of this, please check out my Online Mentoring page, it will explain how I go into even more detail with SEO, finding your ideal client, In Person Sales and if you require it, build you a website that is beautiful, reflective of you and entirely professional looking :)

67bw.png

Saying Goodbye...

When I first opened Simply Actions in May of 2014 I was on a mission. It was to simplify the editing process so that photographers like me, constantly overwhelmed with the amount of editing needing to be done, could get their lives back. 

Editing, for me, is tons of fun... but when I first started it was very frustrating... I loved it when I got it right, but I never really got it consistently right. So I turned to actions. And frequently I found myself frustrated with the complexity of these actions. Some had notes for every step the action did, where I had to click ok through each step. Others had layers turned off so that when I used my favourite key combo (command+shift+e) to merge the layers, it would leave behind the turned off layers, creating another step of deleting those layers before I could save my image. Not to mention I was insanely overwhelmed with the thought of having to play within the action to get it to work fine for me. And my biggest issue is that I couldn't find a black and white action that fit me... normally I loved the effects, but they were too strong for the image, and if I lowered the opacity of the action I was also lowering the opacity of the black & white. 

So Simply Actions was born. 

I worked to create simple actions, with subtle changes that could be built upon each other. B&W actions that had the B&W layer separate so you could control the strength of the effect of the rest of the action. I worked to create a library of actions, and eventually evolved to ACR presets that would simplify and speed up your workflow. And by selling actions individually I felt glad that I wasn't forcing anyone to buy actions they didn't need, only the actions that would help them build the consistent editing look they wanted. 

Simply Actions was my baby, and for two years I worked hard on her. I blogged, sent out newsletters, advertised, and helped so many people. I felt charged every time I came up with a new set of actions or ACR presets. I served over 1000 people in almost 50 countries around the world. I HELPED! It was AMAZING!

But slowly, as time went by, things became sour. You know that feeling when you charge too little money for a session and do more work than you bargained for it? That is how I started to feel about Simply Actions. And slowly it became harder and harder to create actions and presets I was proud of. My heart just wasn't in it anymore. 

At the same time I was getting AMAZING opportunities in other areas of my career! I was mentoring with The Milky Way, an online school for photographers, and eventually they would have me come in as a guest teacher for some of their retreats! Additionally I began to mentor other photographers as well, and oh was it amazing! Being able to help people who were asking for it, not just speaking out into the void, never knowing if your voice was actually being heard. 

So finally it came down to this tough decision. It became too expensive to keep the Simply Actions store running, and it was clear that I was no longer able to give it the attention it truly deserved. So here we are. 

I am closing Simply Actions. 

BUT I am still keeping some of my favorite actions and presets available under my photography website. You can find them by clicking here. I have also brought over my favorite blog articles from over the years, and will continue to blog here.

I may still create actions and ACR Presets in the future. But for now I am putting my heart and soul into teaching. For instance, where selling actions and ACR presets were like selling you fish so you could eat for a day, my newest course with The Milky Way, will teach YOU how to fish, so you can eat (or in reality edit) for a lifetime... by that I mean, I am teaching everything you need to know about Photoshop basic editing, INCLUDING hand editing, and making your own actions! I even dive into hand editing in ACR! Right now, for the holiday season it is at a reduced price, so you should definitely check it out if you are struggling with Photoshop!

Click here for more information on 5 Days to Photoshop

Finally, I want to say thank you to Liberty of Silky Presets, for believing in my ability to take on the world of actions with the help of her store. I want to thank ALL of my testers, throughout the years, you have each touched me, helped me grow and have been the biggest inspirations/cheerleaders I have ever had. I want to thank all of my clients. Some of you have spent more than I could ever imagine anyone ever wanting to spend, on supporting my actions. Your support blows my mind, and it fills my heart. 

Although I am saying goodbye to Simply Actions, I am not sad. I learned a lot about myself, my industry and my career during these two and a half years. These are lessons I will cherish forever. I leave Simply Actions proud and ready to take on the next challenge. The conversation will always be here, so I hope you will join me. 

My Tips to Beautiful Natural and FUN Family Sessions!

It is a gorgeous day today, and looking out window on the beautiful spring weather, the green leaves, the budding flowers, I am excited that I will be outside again tomorrow capturing my first outdoor family session of 2016. Up here in Montreal (Canada) it has been a looooong chilly spring so I am really super pumped to get out of my studio. I didn't always feel like that. Family sessions were very scary to me, as I was consistently anxious about the possibility of running out of ideas, what to do if the kids don't want to cooperate, what if I forget my camera settings, etc, etc. 

I realized that I wanted to share with you guys my tips to getting beautiful natural images in your family sessions and having FUN while doing it! These are tips that I developed through my years of photographing families and learning from my mistakes what worked for me and what didn't. I'm so happy I get to pass these along to you


#1 - Patience is the key! 

The sad truth is that 9 times out of 10 Mom's the only one who really wants these pictures done, Dads are mildly annoyed at best, and kids are normally just doing what they are told. My tips to my clients is A LOT of patience. I work on the kids' schedule - and if there is a meltdown, the worst thing to do is to lose our cool. I have had Dad's lose patience at the first sign of a squirmy kid, saying the photos are just not going to happen. It is my job as a photographer to let him know that it's ok, this is normal, and that if we stick with it I will be able to get them a shot (or fifty) that they will love. For the kids bribery is a great friend to every photographer, although I do not bring candies to my session, I let my parents know that if they want to bring bribes that they are for the END of the session (so I am not stuck editing crumbs and chocolate off of mouths for hours after the session!) I don't bring candies to the session because I don't know what is best for the child or if there are allergies. I feel it's best to leave what we use as bribery up to Mom and Dad. 


#2 - Cycle through ALL of the possible groupings. 

simply-actions-photoshop-actions-acr-presets-adobe-family-posing-tips-4_grande.png

I always start every family session with the family image, its a safety net for the kids, especially if they are young or shy, that way the first time I am pointing my camera in their direction is when they are safe in Mom or Dad's arms. Then I photograph all of the kids with Mom, each kid with Mom, all of the kids with Dad, each kid with Dad, and finally a group sibling shot and a shot of each kid on their own. If the kids are old enough to sit on their own and be safe I will get a bonus shot of mom and dad together as well. If there are extended family there include generational shots, grandparents with the kids, all the women in the family, grandma with her adult kids, etc. Achieving all of these shots gives your client the kind of variety with the images you deliver, so they don't feel like anyone was missed. 

#3 - My 3 TOP SECRET ways to get natural smiles.

- With children aged 1- 6 I will make comically loud sneezes to get giggles... and trust me parents can't keep a straight face either. With the younger and shy-er babies make sure to work into the loud sneezing so you don't scare them (cue the meltdown), and some children might not find this funny at all, but when it works, it's TONS of fun! 

- With the family images I will get everyone seated, then count to three out loud and then say "tickle mommy time!!!" or "tickle Timmy time!!" and normally that results in fits of giggles (everyone loves it when it is tickle Daddy time so I normally save that for last). The key of this is to say "ok, ok, everyone back to their spots! lets see who is next!" and then the kids sit back up and are looking right at me, grinning, waiting to see who gets the tickles next which gives me a great shot of the kids smiling at the camera. Nothing makes a family image better than an image of a family playing and laughing together. 

- If the top two haven't worked (I have had tough crowds before, haha!), or if I have kids that are trained by Mama to say cheese and then smile with all their teeth, I will say "no, no, I don't like cheese, saaaaaaaay STINKY FEET!!" or "Poopy Diapers!!!" I will especially play with the boys saying things like "ooooh wait a second, I smell stinky feet! Who has stinky feet??" (Do not be surprised to have kids answer with"Dad!!") I had one especially shy and sweet 5 year old girl in front of my camera once, that I could not get to smile for me until we started talking about stinky feet (apparently mine were stinky that day.... haha!!) I have no pride, toilet humor (to a degree) is always a winner when everything else fails, especially for the older kids. 

#4 - Give them something to do.

Like the tickle fights above, I find families doing stuff, or children doing things the prettiest  and most interesting photos in the whole gallery. I love asking little girls to twirl in their dresses, or have boys run towards me - siblings doing "ring around the rosy" is lots of fun, especially for the fall down part! I have parents toss their children around, spin them, hang them upside down, everything. Sometimes the best thing is to capture the beautiful chaos that their family truly is. For the quieter families I will sit them down with a book, and have Mom or Dad read to the kids. 

#5 - Get the technical stuff right.


I always use the rule of using the same f-stop as the amount of people in an image. I learned from this AWESOME and informative blog article that I should focus on the person closest to me as the depth of field will include what is behind the focus point more than what is in front. Keep people in the same focal plane as much as you can, but do not be afraid to work with a more narrow aperture (higher number) to ensure you get everyone in focus. 

Make sure you are not over exposing your images. If your histogram on your camera is mostly on the right - you are over-exposing your image - and unlike when you under-expose, if you over-expose too much, even with raw images, information can be lost, and the image cannot be saved. 

Try and put your families in compositionally pleasing poses. It is hard to keep things completely uniform when you are looking for a natural image, but I always find moving myself, coming in close, interesting angles, etc. tend to make for beautiful images. Don't get stuck in the rut of only photographing your clients from afar, get in close, shoot from above, and even shoot from the side. I find the best time to do this is to do it when you have them doing something else and not looking at the camera, sometimes I just tell my families to just ignore me and chat. Give it 30 seconds, and you will be forgotten and they will relax and just hang out with each other. 

I truly hope this has helped you for when you head out to your next family session, whether it is in your studio, their home, or out in the park. If you have any questions please let me know in the comment section below! 


Much love, Reina


P.S. All of these images are mine, and I edited them with The Magic Look ACR Presets and Simply Artiste II.

Where Does Your Passion Lie?

It's the New Year, and along with that comes a time for reflection in me. I take this time to reassess where I am at and plan out my direction for the new year. This year started off at a blinding speed of busy-ness that this introspection was hard. And although I wanted to write something for you earlier, I just couldn't. Until I had a conversation with my husband. In a very interesting and round about way, my husband said something to me that spoke volumes. Passion begets success. 

Passion.
Begets.
Success.

Now begets is a word you don't hear from me often, this is because my husband has spent the past five years learning how to speak like a pompous historian. But basically what this means is, if you have a passion or a drive, you will achieve success. They truly come hand in hand.

This statement came to me at a very significant time for me. 2015 ended on a very high note, but for majority of the year I have been struggling. I live in a new city where I don't speak one of the main languages here. I let my marketing go for a couple of months because I was distracted by other things, and unfortunately that resulted in almost an entire month of no bookings in the summer. Things are better now because I have smartened up, but for a few weeks our household had zero income coming in from my photography business, and I got pretty scared.

And when I got scared I started thinking of things like lowering my pricing (couldn't afford to because of the cost of running this newborn photography business was too high), or I figured I would need to start looking for a new job. 

But here is the thing. I cannot live without photography. I know to many that will sound dramatic and ridiculous, but to some of you, and to me, it's the plain truth. So while I have had to make my passion into a business in order to survive, I could not survive without photography. Also, I do not want to do anything else. The thought of punching a time card in, or getting a paycheck from somewhere else brings on this instant depression. So this passion and this need for photography has pulled me through that scary moment. It carried me through the inquiries that said "heck no, you're too expensive," and it has allowed me to have the patience with those who don't see the worth in what I do. 

If I did not have this passion, I would not be able to get through these rough times. These scary beginning years of a business. But I do know that with this perseverance and this drive to keep growing and keep showing my work, I will reach success. Because when my hard work isn't enough, and when I feel under appreciated, taken advantage of and tossed aside, my passion for this art will carry me through.

Passion begets success.

Where does your passion lie?

When you get scared or stressed FEED that passion. It's what will get you through, it will keep you trucking, problem solving and it will give you the fuel you need to get you through. Whether it's shooting a model session for yourself to let that artist breathe inside of you, or it's photographing your sweet little ones at play, feed your passion. 

They don't call us starving artists for nothing. Whether you are hungry for the art you want to create or actually hungry for food :) it all comes hand in hand, and honestly I would never live a different way. 

So I will ask you again... Where does your passion lie?

Comment below with your passion... I am excited to hear what your drive is :)

To Do or Not To Do - In Person Sales

In Person Sales... seriously, I should have done this post on Halloween, because if you are like me when I faced the decision on whether to do in person sales, you are probably shaking in your boots. Do not fear! I am going to share with you my FIVE tips to success while selling your products in person. 

When I decided I wanted to make my business more boutique, more special, I realized that I needed to step up my service. That involved how I sell my product to my clients. I spoke recently to a few clients after I completed their IPS (In Person Sales) appointment, and I asked them how they felt about coming back to my studio and viewing their images with me. They said these things:

"It was awesome to see my images up on the big screen, then I could really SEE them, I wouldn't be able to see them so well on my tiny laptop screen."


"I really liked having you here to help me decide, you could read me well and seemed to know what I wanted almost before I did. When you had me compare between images to decide my favorite, you made it easier and less overwhelming."

"I felt no judgement or pressure from you, you really just guided me, but respected my decisions."

"I was amazed with how much of a show it all was. It made me cry and yes it made me want to buy more than I had planned but I am happy about it. I am really happy with the service."

Now it's not all sunshine and rainbows, I have had unhappy clients too, but it is always been due to my mishandling of the situation and a part of my learning curve. I would like to give you FIVE tips on how to be successful with IPS, so hopefully you can skip the lessons I had to learn the hard (and expensive) way. 

1) Always be SUPER open about your pricing from the VERY beginning. If you client hires you but hasn't read a clear price list, you will get many clients who are "surprised" that the digitals are not included in the session fee price. This will lead to your clients feeling duped that you haven't been clear with them. Think about purchasing a car, and how it feels when you find out that the floor model is actually more than it says it is if you want the sunroof, the power windows, the four wheels, etc. Being clear about your pricing makes your client more informed and prepared to budget for the cost of their images.

2) Do not look at IPS as just a way to make more money. Although IPS can result in a higher sales average, if you just do that, and do not follow up with a higher level of service, your clients will turn on you. If your sales average is all of a sudden over $1000, then the products you deliver, the speed you deliver them at and the care with which you will deal with your client should reflect that price tag. Do not expect that you can make the high sales average without putting in the work to be worth it. This means always perfecting your craft, high end products, and most of all, swallowing your pride when your client gets upset. 

3) Policies, have them, and stick to them, and make them VERY clear for your clients to understand. For example, my polices include but are not limited to: 
 - every client must come back to the studio (or I travel to them with an additional travel fee) for their proofing appointment. I do not do online galleries. 
- clients must schedule their proofing appointment within the 7 days following their email notifying them that their images are ready. 
- clients must be prepared to choose their order and purchase their package at this session (I do not let them take the online gallery home and think on it). If they would like to think on it that is totally fine, but they will need to schedule a second viewing appointment within a week, there is a fee for this. 
- Once purchases have been made I discard all raws of images that were not ordered, and I archive ordered images for 12 months, there is an archival fee if I need to pull these images out of archive. 


4) Follow up. Imagine this, you are my client - you have an amazing session, your kids behaved, I was charming and funny and you had a total blast. Then you come and see your images and you are blown away with how beautiful they are, you are in tears after the slideshow and the proofing appointment is easy going and you feel no pressure to buy more than you can afford. Then you leave the proofing appointment flying high. Two days pass and you haven't received your digital image download yet. You send a friendly email and I don't respond (I am very busy, you know). It takes a few more tries before you can get your download from me, and when you do its a one sentence email: "Here are your images..." Your wait a few weeks, and you have heard nothing from me on the album you purchased. Again it is a couple more emails before you get an exasperated reply that I am going as fast as I can. Finally it is FIVE weeks after your proofing appointment (so probably at this point almost two months since your session) before you see the proofs for the album design, you want to make a couple of changes and its another two weeks before you hear from me again. 

By the time you have your album in your hands it's almost lost all of it's shine. You feel like you have been swindled and that feeling of this being a worthy investment is long gone. Do you think you will be coming back to me for another session? Do you think you will be telling all your friends to use me as their photographer? Probably not. 

In contrast, imagine that when you arrive home you already have an email in your inbox with your digital downloads, and just two days later you have the proofs of your album design. For every change you have a timely and gracious response with changes made in at least 48 hours. Your album is in your hands three weeks after your proofing appointment and it is just as beautiful as the sample in studio was. I think you would be more than willing to boast about your amazing photographer and your beautiful images after service like that.

The service doesn't end folks. The second they pay you that gorgeous impressive number of dollar signs is when the REAL service starts. So follow up is key. 

5) HAVE SAMPLES!! This is the biggest key to your success in doing IPS. Choose quality products and show them to your clients. Make sure your product is sturdy and professional looking and that it will stand the test of time. We are wanting products that will last decades. So this will mean you need to invest in your samples. As long as you have the cost of your product built into your price you will make your profit on it. 

For instance, I brought this beautiful framed and matted print from CanvasPop to my last IPS appointment. My client LOVED it  and purchased one for herself immediately. Having beautiful professional samples for your clients to feel and touch and especially see the size of does the speaking for you. With an online gallery a client may think oh I can fit this 8x10 over here, but when they see a beautiful 16x20 matted print, they can envision a statement piece, something to really showcase and display. 

Here are some different perspectives on In Person Sales. These are some of my respected colleagues who have taken on IPS for their businesses, here is what they have to say about it: 

"In Person Sales have allowed me to be more present in my family life. Before IPS I was over working myself, taking on too many clients in order to make enough profit. I was spending almost every night editing and always felt like I couldn't catch up. Since switching to IPS, I am able to take less clients while making more. I can now be selective in who I photograph and only take on those who fit my criteria for ideal clients. Taking on 4-5 sessions per month is allowing me to spend more time doing my most important job, which is being a mother. IPS has also allowed me to give my clients a truly professional experience. I can now stand out from the plethora of photographers in my city because I am able to provide tangible portraits. Now that I have finally settled into a groove with IPS, I can confidently say I will never go back to delivering online galleries and crossing my fingers in hope that they order something. While transitioning into the in person method does take time, it is absolutely worth it, not just for your sake but your clients as well." Anel Lestage - Tender Nest Portraits

"Before I started IPS, I was selling online galleries for $250, but almost always discounting that to $200. I set my product prices with the intention of averaging $250. [After IPS] Immediately, my average sale was over $400. The payout though, was far greater. Seeing my clients cry during their slide shows, hearing them gush when they picked up their photos, and getting messages months later about how much they still love having my work on their walls... It was so much more than money. Financially, I couldn't walk away from what my average sale has become, but the emotional draw for me is the biggest win of all." Crystal Phillips - Crystal Phillips Photography

Clients Scheduling Themselves - What will they think of next??

I went to a talk about a year ago held by an ecommerce specialist in Montreal, it was a networking opportunity, but I wasn't sure I would learn anything. Well, of course I was wrong. One of the biggest tips I got from her was to make it super easy for your client to buy your services. Majority of the time, if they are faced with a convoluted process on one hand, and a click of a button on the other, they will click the button. 

So think about it: you work hard on your website... you make it beautiful and you make it flow from page to page, leading your potential client on the journey of what it would be like for them to be your client. They end up on the pricing page, and they think, "Wow! I like this photography! I want to hire them!!" What happens next?

Well in most cases people then have to email that photographer for a full price list, then when they decide they will book they start going back and forth on dates and times, by the time the session is fully booked there have been 3 - 5 emails written by each party. 

What if we did it a little differently. What if we give our clients that buy now button. I wonder what will happen?

Well I can tell you, because I signed up for Acuity Scheduling (thanks to one of my mentors letting me in on her secret) and since then it has been easier to book clients in, and it has decreased the amount of back and forth I have to do normally to set up a session date. Not to mention when a client books themselves in, it is added to my calendar, which syncs with my iCalendar on my phone and laptop, but also with my 17hats calendar as well. I am never without the info I need to know when and what my sessions are!

To start you set up a session, then each session has its own link. When you are responding to an inquiry, or even right on your website give the client that link and they will be able to pick the time of their session. 

You can set the times you are open, and when someone books a session that time is blocked off on your calendar. You can even block off dates. It still gives you lots of control over when your client schedules their sessions. 

And the best thing is that it all connects to your paypal so you can have your client pay their deposit online right at booking. One less thing to worry about! Not to mention the intake form is completely customizable and a great way to pick your clients' brain on what they want from their session!

I have had more bookings and more clients willing to commit to a session using this scheduling program then I have ever had before! I really hope you consider signing up for a trail, you will see how easy it is to keep track of your bookings. 

Just one more thing to not worry about :) Seriously 2016 is gonna be YOUR year for balance!

Final tip! Even though I have everything online, I still love having a printed out and filled in Calendar on my desk, saves me the need to log in or pick up my phone which is a huge distraction while I work. Having a printed out calendar for the month on my desk means I can just glance over to see what I am doing on any given day that month. Every morning I check over my printed out calendar to make sure it matches my online one.

Double booking is a nightmare, one that, for me, has not yet been a reality, but I have come really close... this is why I surround myself with calendars, online and in person. It saves me a headache down the road!

In addition to showing you all about Acuity Scheduling, I have made up a printed calendar that I really love the design of. I hope you do too, and that you get to use it lots over the next year!! Click here for your free calendar!


F-F-Focus on Me!

A few years ago I went from a regular computer monitor to a glass iMac screen. Oh the CLARITY! It was beautiful!! But then I realized something quite alarming... my images were not properly focused!!! 

It completely blew my mind and I could not figure out what I was doing wrong. Mad google searches and posts in forums only found answers about back button focusing, and people who had never seen my photos assuring me that it was my lack of knowledge and technique that caused me to miss focus on my images. 

It was so consistent though, I kept trying new techniques, and after every amazing session was this gut wrenching disappointment in the missed moments I had with my missed focusing. It would leave me in tears. It was months of searching for a solution and getting nothing. 

Now I will date myself, haha, but this was before our awesome photography groups we now have on Facebook. So this tip, you may already know it. But I wanted to make a post about this, just in case there is someone else out there going through what I went through, and maybe reading this will save them months of confusion and frustration.

Its called Auto-Focus Fine Tuning. 

What it means is that sometimes we need to calibrate our lenses to our cameras. Our manufacturers leave a small window of give or take on our focusing, because truly getting it always perfect out of the box is nearly impossible for them. Everyone's camera is different, and every lens is slightly unique as well, so when you get a new lens, if it isn't focusing correctly you will need to fine tune that auto focus. 

For example, my 35mm F2 needs calibration. As you can see here my lens is focusing on the blanket in front of the baby's face rather than the eyelashes I was focusing on at the time. Yes, that's right, even though my focus point was on the baby's eyelashes, the camera focused a few millimeters in front of the baby's face. 

Now it may be hard to see it in the whole photo, but if your client comes back and wants to print this image on a canvas, you have a lot of work to do, and I hate to break it to you, when the focus is missed this much, there is really no saving the image. 


I considered doing my own tutorials on this, but there are actually quite a few videos on it on youtube now that go into a lot of detail on how you can do this in many different ways. 

A lot of them suggest you use a SpyderLensCal from Datacolor, but I have had no issue using a tripod low to the ground and my camera pointed down to a measuring tape on the floor. Where the videos I am going to link below will say you need to focus on the zero, I would focus on the 1 foot mark on my measuring tape and see where my focus landed in reference to that. 

I do want to note - not all camera's will fine-tune auto focus - you will have to check your manual to be sure.

Here are some tutorials on how to calibrate your lenses. 

First here is the SpyderLensCal you will see in a few of these videos:

Here is a more detailed show of how to calibrate your lens:

And finally here is the video I used waaay back when I needed to do my own fine-tuning :) I just liked this guy's sense of humor :) 

I hope these videos help!

I was thinking of when I finally got around to calibrating my lenses, it would probably be a cold winters day, and I would be warm and cozy in my studio with my tripod and measuring tape. When I think of this day that I will be calibrating, I have a hunch that I will be drinking Hot Chocolate to keep me warm. So in that spirit I thought I would also give you some Hot Chocolate - in the form of an ACR preset!

This ACR Preset is super stylized and will not work for EVERY image, its a warm creamy edit, and I feel like it is much like my Bales of Hay PS Action from Simply Autumn. Click here to get your FREE ACR Preset - Hot Chocolate!

Image by Rock Paper Pictures 

Stay tuned for tomorrow's blog where we will talk about my favorite new scheduling system that I love, and your awesome freebie!
 

Getting Those Pesky Skin Tones Right!

White Balance. When I started photography I didn't even know that white balance existed. Then the words "it looks a little cool" or "the skin is too blue" kept cropping up when I would look for some constructive criticism. I never saw what they saw until I started training my eyes. In this blog I am going to show you what technique I used to train my eyes to see correct white balance.

There are two times you can achieve proper white balance. One is in camera, which is probably the best time to do that, but if you are anything like me, white balance while shooting is not a priority. I can only seem to hold a few things in my mind while shooting: proper exposure, focusing on the subject, and achieving the beautiful photo, whether that is with connection, pose, lighting, composition... If I throw white balance into the mix I get way too overwhelmed, so I take care of white balance in post, while I am editing. 

Now I am not one for eye-balling things when I am learning, and honestly until your eyes are properly trained to see proper skin-tones you shouldn't do any guessing when you are warming up skin. Sometimes you will end up with greenish orange skin, or purplish blue and it will frustrate you to no end. So when I found this technique I was SO happy. It is essentially a recipe, but also a jumping off point too. You can follow this recipe and then tweak it to better fit your image. 

If this is your FIRST encounter with proper white balance, when you make these adjustments on your own images you may find them looking TOO warm. That's fine, grow into it and go slowly. But soon your eyes will adjust and eventually you will be able to leave this step behind and begin to guestimate the proper white balance. 


Image by Brittany Bennion Photography using "By The Fire" PS Action


Today I am going to show you how to correct skin tones using CMYK numbers!
 

Let's start by opening this beautiful image here by the very talented Amanda Laing of Amanda Laing Photography into Photoshop.
 

Seeing white balance on something that is white is the easiest way to see if you have  it right. Looking at the blanket in the very top image of this blog, on the before image you can see the white parts of the blanket are blue, in this image you can see that the whites of her eyes have a blue tinge. So we know when whites are blue that the image is too cold. So lets get to work at warming it up!

To start, I am a firm believer of correcting your exposure before you correct white balance, I want to see what I am doing. To do this I go into the Adjustments panel and open up Levels and increase the midtones and deepen the shadows which brightens up the image a bit. 

Once I have done that I will go into the tools panel on the left and select the eyedropper tool:

If you click your mouse on the eyedropper tool and hold it a drop down menu will show, select Color Sampler Tool. 

Then I would click on a spot on her face that is right in the midtones area, so try to avoid upper forehead or cheekbones. I chose the space right at the top of the bridge of her nose.

When you click using the Color Sampler Tool it will open up the Info Panel which looks like this:

In the panel third down on the left, the one that says #1, that is the reading for your selection, but the reading is in RGB, so using the drop down menu (click on the eyedropper under the #1) and select CMYK.

Now here are our CMYK readings for the selection we made.


So at this point we should talk about what CMYK actually stands for. I have NO idea what K stands for :) haha, but C = Cyan, M = Magenta, and Y = Yellow. When you want to adjust these colors you need to know that they match up with three more colors. When you remove Cyan you actually add Red, when you remove Magenta you are adding Green, and finally removing Yellow actually means adding Blue. You will need to know this when you are making your corrections. 

The recipe I was given when I started was confusing and I honestly had to write it down on a post-it and put it on my computer. I recommend you do this too :) 

The recipe: Yellow should be slightly more than Magenta, and Cyan needs to be a third of Magenta. 

As we know all skin tones are different, so you may need to use your own judgement, but the great thing about this recipe is that it sets you on the right path to finding the correct white balance. 

Now back to our edit. 

We know from our numbers above that we need to raise our Yellow, and lower our Cyan. 

Go back to your Adjustments panel and choose Curves. It looks like this: 

In Curves click on this button with the up and down arrow and hand - it will allow you to click and drag on the image to affect your selected curve. 

I always try to start with the Yellows, I find that easier to see where I am going after the yellows have been adjusted. 

So in the same Curves layer I will select the drop down menu that says RGB and start with Blue (remember Yellow is opposite of Blue), once I have selected Blue I will click again on the Color Sample I made on the image, and I will hold the click and drag up or down, dragging down will add more Yellow. 

So now my numbers are showing Yellow a little more than Magenta which follows the recipe, but the Cyan is still really high and that needs to be closer to a third of Magenta, looking at the numbers I would say bringing the Cyan down to an 11 or 12 should work (Magenta is 34 here and 3 x 11 = 33 - I know, I know I hate math too... sorry!)

To lower my Cyan I select Red in my drop down menu in Curves and click on the sample area and drag up to add Red/lower Cyan

Now that I have my Cyan down, my Magenta has gone up so I just need to make a third adjustment in Green, I select it in the drop down menu in Curves and click and drag up on the sample area in the image. 

And that, my friends, is the correct skin tones and white balance for this image. 

beforewb_medium.png

Side by side, this might look weird, it did to me when I first tried it. So stick with where you are comfortable. It's not the end of the world if you skin tones are a little cool :) we are artists in charge of our own canvases :) but using this method WILL train your eye to see proper skin-tones and if you are ever in a bind and unsure or your white balance, this will help you out in a pinch!

Today's freebie is an action I created for Photoshop CS5, 6 & CC that will help you warm up your images, make sure you use this action with cool images as it is meant to make your images warm - that's why I called it "By The Fire" Click here to download your FREE PHOTOSHOP ACTION here. 

Image by C&D Photography edited with "By The Fire" PS Action

Image by C&D Photography edited with "By The Fire" PS Action

And, please, share this with your friends!

I hope this blog tutorial was helpful for you! If you would like a video version of this in the new year, comment on the blog to let me know :) 

Top Tips for Getting Recognized On Social Media

For today's blog I have once again dipped into my MAJORLY talented pool of testers to give you yet another educational and inspirational post. Brittany Gidley of Brittany Gidley Photography is a POWERHOUSE. She runs a highly successful and loved business in Cleveland, Ohio, but her following of photographer friends is vast and spans the globe. Many people look to her for advice and inspiration so it seemed just common sense to have her speak to you for one of these special Christmas days. 

One thing that has always amazed me is how she works with Social Media, so she agreed to give you her 5 top tips and tricks to getting recognized on social media! So without further ado - HERE'S BRITTANY!!


#1- Be consistent with your branding. 

The most recognizable brand in the world, Coca Cola, changed their logo once- in their first year of business.  For the past 128 years the branding of those words has stayed relatively unchanged.  Take what they have done right & apply it to your own business.  Stop trying to follow the trends of colors, watermarks and websites.  Instead, find what is uniquely you.  Developing strong business branding recognition takes time but it is so worth it when clients start to say that they are seeing your business everywhere!
 

Image by Brittany Gidley Photography

Image by Brittany Gidley Photography

#2- Be different. 

You are one of a kind.  Listen to me when I say that God has planted seeds of greatness in you.  You have abilities that are special & talents that are unique from any other artist near or far.  Use those abilities to create concepts, sets and, ultimately, images that have never been seen before.  If you can produce a product that no other photographer is offering, than you will become even more exclusive in the mind of the consumer.
 

#3- Befriend businesses. 

You have a talent that can bless others.  More than likely, there are businesses close to you that can bless you as well.  Why not collaborate on something unique and over the top.  Not only do you have the benefit of cross-promoting each other, but you're likely to develop some awesome friends along the way!

Image by Brittany Gidley Photography


Image by Brittany Gidley Photography

#4- Be vulnerable. 

Don't be afraid to let your clients get to know the real YOU.  When you have a joy- share it with your fans.  When you have a prayer need- share that with them too.  This is how long lasting relationships are developed- by lifting each other up in times of need & in times of rejoicing.  
 

#5- Be social. 

The best social media tool is the one that you will actually use.  Find what platform you love & share with your fans.  Also, don't be afraid to search hashtags of interest to your business to leave some love on their pages too!  When you are posting and sharing, not only about business, but about the person behind the scenes of your business you will be thrilled in how quickly your social media outlets will grow!

Image by Megan Milligan Photography


Image by Megan Milligan Photography

Inspired by Brittany's personality that is full of glitter and sparkle, I have made a couple of Glitter Brush Actions and Some Bokeh Overlays for your gift today!! Click here to download your Free Gift! Please feel free to share this gift with your friends! <3

Stay tuned for tomorrow's blog where you will learn my trick to learn how to get the right white balance while editing. And tomorrow's free gift is something brand new to keep your images warm in this cold winter! :)

Photographing the Little Things

Today is a real treat for you guys! Every time I see Devin Burke of C&D Photography's Macro work I die inside, because I always feel like there is no way I can achieve a macro image so beautiful. Well today you and I both are super lucky, because Devin is letting us know his tips and tricks to getting beautiful macro images! 

F2.8 1/80 ISO 640

1. Use Live View & Manual Focus

Ew Devin, I actually have to focus it by myself? Why can’t I just use autofocus? Well, macro (micro for you Nikon peeps) lenses tend to focus slower and when you’re so close to an object your lens might search a bit, which may cause you to miss your moment and we don’t want that! Manual focus will help speed up the process! Live View makes it super easy to focus manually too, because you can use the little magnification tool and zoom in on your focal point!

Freelensed 1/160 ISO 100

F4.5 1/80 ISO 250

f2.8 1/80 ISO 200

 2. Don’t Breathe

I’m not kidding, hold it in while you’re focusing and taking the shot, especially if you’re super close! Even moving the slightest will shift focus! You can use a tripod as well! I personally don’t like them because I find them restricting and clunky, and ain’t nobody got time for that, especially when trying to take a picture of that butterfly.

F2.8 1/60 ISO 250

3. Focal Point

Where you focus on a subject can give you totally different images! Play around with what you focus on! For example on a flower, try focusing on the edge of the petals, then the pistil if it has one, then try focusing on the very center of the flower.

F2.8 1/125 ISO 400

F3.2 1/125 ISO 400

4. Backlight

This can make or break your images. Backlighting looks SO good in macro photography! It’s definitely one of my favorite techniques to incorporate into my images, all of my images actually. It adds so much depth and beauty to the shot and can really take it to a whole new level. Backlighting is really quite simply, I know it can be intimidating at first but all you have to do is meter for what you want to be at the proper exposure! If you aren’t in a rush to get the image play around your settings! Take an image, review it, alter your settings if need be and shoot it again and repeat these steps until you have that perfect image! Also, if you find too much light is being let it in put on your lens hood and if you don’t have that, use your hand at the end of your lens, just make sure to not get it in your shot!

F2.8 1/80 ISO 250

F3.2 1/60 ISO 250

5. See the Unseen

That’s right, see the unseen. Don’t shoot what everyone else sees. Get on the ground and look, not for anything specific just look. Go up to a bush and look closely at it. Keep your eyes peeled, and when something catches your eye, shoot it. When you’re taking a picture of that rose, don’t get the shot that everyone else gets, get something different! Take detail shots of the details, then use those to make a collage.

All F3.5 1/60 ISO 250

6. Editing

My favorite things to edit my macros tend to be darker, more moody edits. They typically have some sort of matte, whether it be just a little or a deep heavy one. I like my colors to be deep and rich. I like it when my subject POPS.

Here’s a list of some of my favorites from Simply Actions that I LOVE to use to edit macros!

Simply Action’s Artiste 1 & 2 

Gear 100mm macro and Canon 60D

Devin is selling a beautiful calendar of his macro images - here is the link to purchase! 
http://canddphotography.bigcartel.com/ 

Here is a link to purchase any of his prints:
http://canddphotography.shootproof.com/gallery/642483/

Finally if you are looking for Devin, here is where you can find him! 
canddphoto.com
facebook.com/canddphotography
instagram.com/canddphotography

Keeping Organized - Easier Said Than Done

With the New Year quickly approaching, so is the time for new year resolutions. Now I am not one for making promises I can't keep, so I tend to shy away from making a resolution. Instead I try to use one word to represent my goal for the new year. It can be pretty ambiguous, which I enjoy because the pressure is off, but it also gives me a direction to put my focus on. My goal word for 2015 was Balance. I really worked hard to try and find more of a work/life balance. And to be honest, as goals go, I didn't really achieve the ideal balance I envisioned on January 1st, 2015, but I am closer to balance than I was in 2014, so that is technically a success, right?

One of the main topics I did a lot of research on, in hopes to achieve this work/life balance, was organization. Especially within my business. So even though I am not as organized as I would like, I want to share this research with you in hopes that I can give you a bit of a jump-start on getting your 2016 more organized.

Here are my top 5 tips to help you get organized.

1. Organize your desk. 

While messy desks are supposed to give you creativity, and what was that thing Einstein said about cluttered desks and cluttered minds and that empty desks mean empty minds? I have much respect for the dude, but oi vey, I cannot function with clutter on my desk. In fact, I notice that my stress level only seems to rise when I leave my desk messy. 

With that said, this is one of those areas I am still working on myself. So I do not have a beautiful before and after image of my desk to show you how organized I am. But I thought I would share with you my Pinterest board that I have accumulated. It has much inspiration to go off of, and lots of tips and tricks too! I am looking forward to the slower months where I can really focus on this. Click here to see my Pinterest board!
 

I truly feel once you have a clean and organized desk, working feels more like a sanctuary and less like a stress ball. 

Pro Tip: when setting up a filing system, do not name a file Misc. or else you will find yourself filing everything into that file and in the same boat you are in now. 
 

2. Lists, lists, and more lists!

I am a BIG believer in lists. And there are times where the tasks I have to do get so overwhelming in my head that I can have them running over and over in my mind, keeping me from a good nights sleep, which only adds to the stress.  

Writing a list allows me to get a clear idea of what my tasks for the day are. It gives me a chance to properly prioritize and it also helps to keep me on track. They keep me accountable, and they free up my mind back to what I want to be thinking of: a new lighting technique or a pretty newborn set up!

To help you out with writing your own lists, I have included in today's gift a daily planner. It will help you to list out your daily tasks and schedule them throughout your day. It will also help to give you an idea of what is coming up for the week. You can then put your top three tasks you MUST get done in the to do list. And finally you can keep track and make sure you are drinking enough water, hydration helps to keep you efficient! Keep reading because there is MORE in this gift for you today! 


3. Workflow

As professional photographers, and even hobbyists with family and professional lives to maintain, streamlining your steps with each client helps to give you less time doing the non-photographer stuff, and more time doing what you love, and with the people you love. 

When you are building a workflow that works for you, you first need to understand your strengths and weaknesses. Are you fine emailing clients at any time, but can't keep a handle on your client information? Do you find it hard to remember when you have a session booked, or is hard for you to remember the names of all the people in the family you are photographing? My weaknesses lie in bookkeeping and ordering product. This has helped me to choose a business system that worked for me. 

I have been using the service 17hats.com for the past couple of months. It allows me to automate things like my bookkeeping. And while it helps me with keeping templates of email responses for clients, it allows me to review and edit the email before I send it out. Other business systems I tried over the year would send out canned responses and I felt that lost the personal touch that my clients love to see from me. 


There are many other business systems out there, I have many colleagues who love using StudioCloud or IrisWorks. The great thing about 17hats for me was that it connects to my iCalendar, which allows me to see my sessions, appointments and to do lists on my computer and my iPhone. In this day and age I am sure there are ways to have your information on all of your devices and I highly recommend doing that. You just never know when you will receive a question from a client and it's always great to have your information right where you need it. 

4. Back up!

Back up everything. This may seem weird to put in the organization blog article, but I feel like this is a HUGE time saver when you have unpredictable computers that can sometimes just quit on you. I have an external hard drive, and I use Dropbox and Backblaze.

I use the external to keep my raws, edited images, as well as my order designs. Here is the hard drive I use. Guys, I have dropped this from a height at least 10 times (not proud of this, but I am a klutz), and it still works. MEGA sturdy!

I use Dropbox for my actions and ACR preset backup, as well as other tools, and miscellaneous paperwork and personal projects.

Backblaze backs up my computer completely nightly. It will save files for 30 days, so if my computer breaks or is stolen I can just use the previous days back up on my replacement laptop and have the exact same computer back again. I have had a transfer of raw files, for a wedding, to my external corrupt, and I did not notice this until 28 days later. Thankfully I had saved the raws to my computer, and even though I had deleted the file later, the file was still on my back up from 28 days ago. It saved my butt BIG time!
 

I also use Shootproof to archive customer galleries... it's always helpful to have online access to all of my edited images. 

5. Desktops.

Just like you desks, your computer desktops should be kept clutter free... it means easier access to your files and your computers thank you for it by running faster :) 
 

To help you keep your computer desktops beautiful and organized I have some gorgeous macro images by Devin Burke of C&D Photography that I have made into these three Desktop Wallpaper Organizers you see above. Click here to download your wallpapers and daily list planner.  If you have friends who can use these tools please share this blog with them! <3

I truly hope that these tools I have made for you today, as well as my tips help you to reach a more organized status than you are at currently. 

If you have any tips on how to stay organized, please comment below, help a sista out! haha. 

And after you are done drooling over Devin's gorgeous macro images, get excited for tomorrows blog! Devin will be joining us and giving us tips on how to achieve macros as beautiful as his are! 

A Class on B&W

I really love black and white photography, my introduction to beautiful striking black and white photography was a showing of Yousuf Karsh's work. His play with light was like a tall glass of cold water on a hot day - and I drank it right up. Then when I began to study the art of photography I was introduced to Ansel Adams, another black and white photographer - whose eye for composition turned every image into a three course meal for me. I ate it all up. 

...let's move on before my weird food and drink analogies make you too hungry to read the rest of this blog. 

Despite my familiarity with some masters of black and white photography in the early stages of my career, black and white photography always seemed to escape me. Black and white images became my crutch: when a picture looks like crap in color, make it black and white... because SURELY that means it's still art, right? Or don't know how you are going to edit this image, and it's late, and it's hour seven of straight editing and you are too tired to care? Make it black and white... Even now when I know a bit more about what I am doing, all these years later, I still have clients who see my black and white image ask to see it in color (breaks my heart EVERY time!).

So it is about time we sat down and looked a little deeper into the B&W - and who better to help us dive into the intricacies (and let's face it the AWESOME) of this genre, then our own resident master of black and white - Elizabeth Gleese of Elizabeth Gleese Photography!

Let's take a look at her portfolio and dissect what makes her images so amazing! Then we will take what we learned (and maybe a free gift) and apply it to create our own beautiful black and white image!

COMPOSITION

This image is a PERFECT example of using the composition to draw your eyes to your subject. With her face obscured and her head framed your eyes are drawn to her inquisitive eye right in the middle of the image. Without the distraction of color, black and white images rely heavily on composition to help tell the story. 

The lines in this photo draw your eye to the mom and boy, you see her hands playing with his feet as she watches him nurse, something she has probably done since he was born. This is the story that this image told me, thanks to the composition. 

FOCUS

The focus of your image helps to tell your story, whether it is in color or in black and white, but it is never more clear when color is stripped away. In the above image I am drawn to the hands holding and supporting this sweet little girl, the love on their faces are perfect, but the hands show that the love is strong and all encompassing, not to mention you lose track almost of which hands belong to mom and which belong to dad, symbolizing how much, as one, they love this being they created together. 

The focus here brings you into this moment, this couple once two are now three. And her exhaustion, his gratitude, and how his arms are around them both, draw you into the moment with them. You can feel his thoughts are to protect and comfort his two loves. You can feel how, for them, they are the only people on the planet in that moment.

The use of negative space can help you focus on your subject, you can do that by using the expanse of a large wall or the sky behind your subject. In this case having the background so blurry, and somewhat dark helped draw your eye to his face. This helps to tell the story because you follow the direction he is looking, wondering what he sees.

LIGHTING

Nothing is more beautiful to me than the play of light and dark in a photograph, and black and white images only seem to highlight that contrast. 

With the way this image is shot, it's almost like there is a spotlight that is on their hands, the contrast between that and the dark background shows you exactly what this image is about. It draws your eye and helps to tell the story. 

These three main elements of a good black and white image all add up to deliver an emotion and a story. And like the scratchy sounds of a record being played, the nostalgia of a grainy black and white image takes us back to a simpler time, a time when black and white wasn't a fad, when it wasn't a fix for a bad photo, but a time when it told a story, and held immense emotion. 

the nostalgia of a grainy black and white image takes us back to a simpler time, a time when it told a story, and held immense emotion. 

I want to encourage you, dear reader, to take your camera out today, and intentionally shoot a black and white photograph.

Play with focus, light and composition, and let your camera tell the story. Shoot in color, but plan to only see black and white. Look for interesting angles, different compositions and use that light and focus to highlight what story you are trying to tell.

Here is my attempt.

To help you with your challenge today I have a brand new ACR preset to give you for FREE! Today's Gift is this beautiful Deep&Rich B&W ACR preset that I used to edit my image above!!

It celebrates highlights and shadows, adds clarity and a gorgeous deep vignette. It will help you make your beautiful black and white image shine!

Click here to download your free preset! And feel free to share this post with your friends so they can play with this beautiful preset too!!

HAPPY TOGS by Tracy Joy

I met Tracy Joy by finding her Happy Togs page on Facebook. It was right around the time where I was considering starting a movement a lot like what she started there. I am so so glad that I found her page because it is way more organized than anything I attempted would have been, haha. She has such a set vision and a plan, and I truly believe that with time our industry will be changed for the better thanks to her hard work.

Because of this I wanted to have her speak to you guys, my friends. Here is what she has to say:

HELLO! I am the ever geeky, totally loud & obnoxious, people pleasing Tracy Joy.

Along with my other sites, Prop Insanity & Tracy Joy, and ThePropShops.com I am the proud partner (along side Jessica Weinstock) in a sweet little site called THE HAPPY TOGS.

What is the Happy Togs? It’s a SAFE PLACE for photographers… to mingle, network, be and get inspired, but most of all… to be HAPPY.

In the past few years, I’ve seen an increase in negativity in our beautiful and colorful photographic industry. From being over competitive, unfriendly, backstabbing and even a new word being birthed… the BULLY TOG. This made my heart ache, and my “people loving” soul feel confused.

WHY DO WE HAVE TO BE COMPETITION. WHY CAN’T WE BE FRIENDS?

I will state the obvious.. we ARE competing for the same clients… we have mouths to feed, bills to pay, and business to built…. but to me, that doesn’t mean we should indulge in the ugliness of lashing out.

So, HAPPY TOGS was born. To help photographers (and vendors!) set guidelines. Good, solid, heartwarming and constructive business owning. That we can all be friends, as well as business owners.

The most fun in the HAPPY TOGS ADVENTURE… our shoot outs! We just had our very first, in Chicago… and along side 25 other professional photographers in my area… we SHOT TOGETHER! Side by side… with beautiful models and stylized scenes from a magazine… we worked together as photographic ARTISTS, not as competition. It was beautiful, in so many ways. New friends were made, inspiration was shared, and at the end of the day… we all shared a glass of wine (or a moscow mule, ha!).

I mean, what is not more glorious than having friends who share your passion… your creative inspirations… and who totally love to geek talk about camera gear. LOVE IT!

There is enough UGLY in the world we live in, so why not spread some happy throughout it.

BE HAPPY… it feels so much better for the soul.

xo Tracy Joy
The Happy Togs
Prop Insanity
Tracy Joy Photography

The Importance of Defining your Brand

When you are getting started in your business, you hear from countless people that you need to Define Your Brand. But what does that mean?

It's not just picking out a logo, or a color scheme for your website. It's not just designing your business card. It's a long thoughtful process that is way more complex and it goes deeper than you can imagine.

I want to tell you what you need to do to develop your brand, and finish off with a story showing how having a fully developed brand helped me just last week!

1. Define your client.

In order to flesh out your brand, you need to think about who you are speaking to. Is it brides? Expectant mothers? Seniors? Let's go deeper than that, what types of brides? Where would those expectant mothers shop? What schools do your seniors go to?

If you have established for yourself what your cost of doing business will be, and how much you need to charge in order to have a sufficient income. Knowing how much you need to charge will help you to decide what type of client you are looking for. But it STILL doesn't just end there.

Here is an example of an ideal client avatar:
Specialty: Maternity/Newborn
Ideal Client: expectant mother
Age: 30s
Interests: art, photography, gaming, cloth diapering, entrepreneur, reading, music (love for the Beatles is a must :p lol), biking, swimming, movies (indie movies, but not the totally obscure art movies that no one really understands), charity work, and family, Fruit Loops.
Shops: Gap, children's boutiques, record stores, etsy, farmers market, doesn't like chain restaurants.
Where do they live?
What are their morals and values?
What is their personality like?
How much does she make a year?
How much does she spend on luxuries?


(edited with Bliss 5 from The Clean Look & True and Sweet Slumber from Simply Dream)

Defining this will help you to figure out how to speak to these ideal clients. You want to speak their language, so if they believe in sustainability and not hurting the environment, advertise that your products are environmentally conscious and that you build product to stand the test of time. If their beliefs are in the family is important above all, talk to them and show them that family is the cornerstone of why you do what you do. Define who you are speaking to and then speak to them. This will make your marketing that much easier.

2. Define your why.

Wait... So why are you doing this, anyway?

This is super important. You need to define your why. Figure out what it is you are doing and why it is you are doing it. This will assist you in speaking to your ideal client because you will be able to show them the drive behind what you do.

My why to do photography is all about validating love. I am fully aware that life is not always pretty, and it puts us through tough trials that feel like they can just crush us. But it is my hope that my clients, being surrounded by the proof of their love with my images on their walls, the proof that THEY ARE LOVED helps them through the tough times and makes them stronger. Sometimes your family isn't always with you, but they can be in your photographs, and knowing that you are loved is sometimes a lovely reminder if you feel alone.

When I speak to my clients it's with this in mind. And if they ask I am able to fully articulate why I do what I do, which helps them to figure out for themselves whether I am a right fit for them.
 

(edited using Bliss 2 from The Clean Look, Simply Artiste, and Sweet Slumber from Simply Dream)

3. Define your style.

It's what will help you figure out the fun part of branding which is your color scheme and logo etc. I find that while defining your why is the intellectual way you speak to your client, defining your style is like your body language. So what does this mean?

Consistent edits, a specialized genre, a clear style and unspoken message in how your website looks and invites people in.

One way that was taught to me a few times that helped me to define that style was to post on my personal profile on Facebook and asking my friends and clients to try and define my style in three words. I thought I was going to get 50 different words, but instead I got a variation of three, warm, timeless, and authenticity. And these words fit my why so well I kept those words and my style the way it is.

This assisted me when talking to my logo designer about what my logo needed to look like. I chose colors that were warm and timeless, I wanted a design with a vintage yet modern flair, and I wanted my website to be simple yet warm and with a timeless feel.

If the words I received did not fit my why, I would have started to do what I could to figure out how to get my voice, my why, to speak through my photos. So that might have been posting more candid shots on Facebook as opposed to posed, and shooting and editing sessions with my three words in mind.

These three things are vital in focusing your business and your marketing in a better way. People are more willing to purchase your services if they are not confused. They won't be confused if your message is clear.


(edited with Magic 10 - The Magic Look, Simply Artiste, Innocent & Intensity from Simply Dream) 

How knowing my brand helped me:
Knowing my who, my why, and my style assisted me in this past week in corresponding with an unhappy client. She emailed me over a mix-up in her order and told me that she felt like she was being cheated.

My heart dropped.

This was not good.

But because I knew WHO I was speaking to, I knew HOW MUCH she spent, and I knew my WHY, I didn't focus on my feelings about it, I was able to instead focus on her feelings and speak to her in a way that she understood and appreciated and I was able to rectify the issue and have her feeling 1000 times better about me than she did when we began that discussion.

So knowing your brand helps you in the front end of your business (bringing in clients) and in the back end as well (retaining those clients), and this is why defining your brand is so important. Dig deep and lay it out in front of you. You would be amazed at how much it helps you in your day to day decisions as a business owner.

Comment below with what your three words are for your style, or tell me what your why is! I can't wait to hear from you lovely readers!

Much love,
Reina

10 Ways We Can Make Our Industry Better!

Some people fear for our industry. They say it's going in the toilet. They say it's over saturated... They say it's lost its professionalism and its value. 

I say eat.my.shorts.

But that's somehow counter-productive seeing as that response is a little childish... So here is a better response.

10 ways that I think will SAVE OUR INDUSTRY. 

Disclaimer: I am just a Canadian who is living the majority of her life under a rock, busy making actions, snuggling newborns and trying to avoid letting my pug sneeze in my face... So please know that I am not an expert, these are opinions. Not facts. Also I am sure there are more than 10 things we can do, but this is just a starting point - we can grow from this and only get better and better!
 

(edited with Simply Artiste) and yes this is Vespa. I have no shame. She is the cutest ever.

1. Run a legitimate businesses. Get registered if your country/state/province etc requires it. And yes, I know it's no fun, but PAY YOUR TAXES. Get insurance, if anything happened to your baby (camera) you need a cushion to fall back onto. 

I will say this a couple of times. If you want to be valued by your clients and you want them to pay you money, you need to SHOW them you mean business.... Literally. 

2. Use contracts. I say this because not only does it protect you and your business, but also because it lets your client know what to expect. DO NOT write them yourselves. This goes along with being legit - invest in the cost of having a lawyer look it over. 

3. Invest in your knowledge. If you are a workshop addict like moi, then you know what I am talking about. Sitting in front of the computer reading conflicting opinions from every Tom Sally and Reina (it's a popular name!!!), it can get confusing, and you constantly question yourself. If you find a photographer that you love and respect, and they throw an online or in person workshop - INVEST in it. And go and be inspired!! (If workshops aren't your thing, that is fine too!! I am just grateful for the communities and continued help and guidance I have received from the workshops I have taken).

Also invest in the time that is needed to hone your craft . Practice, practice, practice. They say it takes 10,000 hours of practice to be a master. Be patient, it's the ride that has all the fun anyway, not the destination :) 
 

(edited with Simply Artiste and Puppy Love from Simply Love)

4. Invest in your equipment. But do not rely on it!! We all hate it when our clients talk about how our nice cameras take the nice pictures when it's really us. Well same goes. You can take beautiful images with any type of camera. So don't think a nicer lens or a full frame is gonna solve your problem. (I am smiling as I type this because this was me last year). Invest in your equipment, just don't turn your equipment into the bandaid that is meant to fix your bigger problem which is you need to practice more. If this is you just put your credit card down and return to number three on this list.

5. Do not cut corners. Your clients are paying you. With money. Money they worked hard for. Honor that. Respect that. Give them your best. This leads me to number 6:

6. Take your emotion out of your pricing. Charge based on your desired income and the cost of doing business. If you feel you are not good enough yet do more portfolio building... Have your full pricing where your clients can see but charge them a smaller fee. That way the pressure is off you, but they still see your value :) 

Do not overbook yourself. If you overbook yourself regularly, then it means it's time to increase your prices. The demand (sessions) is high but the supply (your time) is low (I mean y'all have families to be with and lives to live!) so simple economics, low supply and high demand raises the price. This allows you to spend time with your client, treat them like the gold you have always wanted them to feel but you were too busy to remember how to tie your shoes. Slow down. Overbooking will only burn you out. When I overbook myself I start to hate photographing people, and that makes me sad, because I know how much I love it, and I know that my inability to say no is killing that passion. I always try to be careful to not do that. 

6.5. Charge pricing that is competitive in your local market. Don't undercut your colleagues, and yes they are your colleagues!! Not your competition! It's not fair to them, it's not right. It's actually kinda lame. So don't do it. But at the same time - if you see someone charging less than you do, this does not necessarily mean they are undercutting you - it could be that their overhead isn't as high as yours, they are consciously targeting a client with a lower budget, or they are not doing a boutique style studio. It is best that you price yourself competitively and enough to properly run your business, and keep your nose in your own pie. 

7. Stop labelling local photographers as competition. They are your colleagues. You may compete in quotes for the same job, but you are completely unique. Your style of photography is just yours, and 9 times out of 10 your client is hiring you because they click with you. That's it. They love your work but the deciding factor: do they feel like they have a rapport with you? These are things that you cannot compete with other people over. So stop. Treat your colleagues as such. Go out for brunches! And when your month is fully booked pass on the referrals! 

(edited with True Love from Simply Love, True from Simply Dream and Vignettes from Simply Artiste)

8. Stop... And I mean it, just stop... Stop commenting on other photographers business pages with your opinions or CC of their work. Know there is a line, it's called professionalism. Don't cross it! No matter how much you feel that photographer may ask for it. Because here is the thing. Your clients might be seeing this. Again: you want them to value you, you want them to pay you money, then show them that you are a professional! Repeat after me: "no drama for this mama" (I have a fur child, it's allowed). 

9. Be aware that you are an artist, so your feelings about your work are subjective and hyper sensitive. Understand the balance of: you are providing a service, but that they are hiring you for YOUR talents. Finding that balance of knowing where to have your boundaries and when you will say no, and how much you will say yes is incredibly hard. And it takes time. It's a lot of growing pains. Deal. It sucks but deal. Never go back on your word, under promise and over deliver, and when all is said and done, drink some wine or eat chocolate, decompress and unwind, and try not to take it all so personally. Trust me, I know it's hard. But try :).

10. Be grateful. You have found your passion. Photography is your lifeblood and you have found your purpose. Not everyone gets that, not everyone gets to do what they love for a living or even part time! So remember how lucky we all are. And be nice, put positivity out there, let go of your ego, you will learn so much more when you do. 
 

(edited with Simply Artiste)

And most of all, be happy. Enjoy.  

Much love,
Reina

NOW WHERE IS THAT MAGIC BUTTON? LIGHTING - THE KEY TO FINDING YOUR STYLE

This week I wanted to chat with you about "finding your style."
 

Last September I went to Click Away and I got to sit in on a seminar led by Kristen Cook, an amazing Australian newborn photographer. And what she had to say really resonated with me. 
 

She talked about how we look to other photographers work and in seeing what is amazing about their work and what is not so amazing in ours, we start thinking: oh "I just need that blanket" or "I just need that lens" to have images look that good.  
 

And it struck me at how much we can look to external things to improve our photography, we are on this never ending search for that magic button to press to make our photos go from meh to MAGNIFICENT!! 
 

adobe-photoshop-actions-simply-presets-camera-raw-1_large.png


(edited with Bliss 2 from The Clean Look and Awaken from Simply Dream)
 

I know I have done this with blanket backdrops for newborns, props for newborns, lenses, a full frame camera, I even used to do it with actions and editing techniques... I have dropped in all literal senses of the word: LITERALLY thousands of dollars on searching for that magic button.


Then this winter, when photographer blues hits us the hardest, I began getting beyond frustrated with my images. Speaking to colleagues I started to second guess my actions, my talents, my abilities. "I'm just a hack!" were words that actually came out of my mouth!! 
 

When I finally stopped beating myself up, I decided to find the solution to this problem. I mean I am not a hack, really... So what is it that is standing in my way of LOVING my work?

That's when it dawned on me. Something that happened to me a couple of years ago is the key to me falling back in love with my work!!
 

Thinking back to when I first started photography, I would go insane trying to FIND my STYLE... It was a daily quest. And a super frustrating one. Then I took the Illuminate course with The Milky Way. And soon after that people started saying that they could pick my pictures out of their feed!! I was amazed! I didn't know how but I had found my style!! 
 

Remembering this made me realize the answer has been staring me right in the face all this time!! The ticket to finding your style is good lighting!!! You will not love your images if the lighting is somewhat off. And you may know how to compensate for that bad lighting with processing in Photoshop, but it will never make you truly happy. 
 

So there it is folks! Lighting! It's the key to finding your style and it's the key to being happy with your images. 

(edited with Magic 4 from The Magic Look)
 

So if you are looking for your style, or looking to find out why your images don't make you happy, put down your credit cards, get off those prop sites, and get into a lighting class. Or research it online. And MOST IMPORTANTLY: practice, practice, practice. 
 

Find. Your. Light. 
 

(edited with Magic 1 from The Magic Look and Sweet Slumber a limited release action available with a purchase of the full Simply Dream set)
 

PS If you are interested in taking the Illuminate class, course registration for March classes closed yesterday, but if you email lisa@themilkyway.ca and tell them Reina sent you they can fit you in (and I get a bit of love back too!!) Illuminate is a super affordable and informative online course that opens you up to a wonderful and positive community of photographers who leave the drama at the door and focus on bettering each other on their growth as photographers!! Classes start March 18th!!

THAT TROLL UNDER THE BRIDGE - HOW TO MOVE PAST YOUR OWN LIMITATIONS

I have had some very interesting conversations this past week with some photographers that I admire and respect, and I was shocked to hear what they were saying! They were talking about how they couldn't get their images to look JUST right, there was something missing in them, and they couldn't figure out how to put that magic in. Then they went on to say that they had taken a few workshops and that has helped them, but they can't seem to make their images have that same magic as their favourite popular photographers do. Essentially they were frustrated with their images not looking as great as their teachers' and their favourites and they couldn't figure out why! 

Is this something that sounds familiar? It does to me, I have had this frustration myself as well! But I have come to a realization in the past couple of months of introspection and I want to share with you my views on this and help you to stop standing in your own way. Allowing you to cross over that bridge into your OWN greatness. Finding your OWN magic. 

1. Stop Comparing Yourself to Others - Like a broken record, we hear this all the time. And I can post that quote by Theodore Roosevelt about comparison being the thief of joy, but what does this statement REALLY mean? Why must we stop comparing ourselves to others?

I was at a talk with a pretty awesome photographer at a convention last year and she said some very interesting things that helped me to understand why we should stop this constant comparison. She is a very popular photographer and many people try to imitate her style. Heck, even I thought the answer to my own greatness was to eventually drop the cash for one of her classes and then I could be amazing too! She showed me how wrong I was when she explained her vision and her own inspiration behind her images, about how they are stemmed from how she was raised (in a completely different environment than me) and how although she and I had a similar view of the world, she had her own view and I had mine. 

It was in this talk that I realized the difference between inspiration and comparison. 
Be INSPIRED by the greats you love, but never compare yourself to them or try to be like them. Their work is their own story, their own heart and soul. Allow your heart and soul a voice in your images. I truly believe when you do that you will see that spark of magic you may be missing in your images.

m2fb_large.png

This is an image I took after watching this photographer shoot. I can see the inspiration she gave me, but I can still see a WHOLE lotta Reina in here too... namely that I would pick a beautiful back alley to shoot in, as well as my editing style. (edited with Simply Artiste)

 2. Don't Let Fear Hold You Back - This past couple of years has been a BIG lesson on fear. I moved across country to a new city where I had NO network and tried to work full time as a newborn photographer. Boy was that scary. Guess what? I did it! And I succeeded!! I definitely needed support (my husband is amazing) but I saw an opportunity to stop making excuses and to stand up and make my dreams MINE and I did not let fear stand in my way!. Another lesson on not letting fear stop you was contacting Liberty Kifer to be a tester for her Lightroom presets over at Silky Presets. I normally would have talked myself out of contacting her, but I had just moved across country and I was feeling cocky LOL. And here I am now, because of that one moment of fearlessness, with an actions company and an amazing community of testers and customers! But most importantly, working with Liberty and then working on my own to develop actions I finally found my editing style, all because I pushed myself to be greater at something then I was, regardless of how scary.


I entered into this session with no vision, no idea on what I was going to do to push past what I normally do. But I let go of that fear of not having a plan and I allowed the session to flow. And it flowed into this image. One I am truly proud of! (edited with Simply Artiste)

Fear is going to be your companion on this journey as an artist and photographer. Realize this, understand it, but never let it hold you back.  


3. Progress Means Walking Your OWN Path - Workshops are meant to teach you technique not style. Take your share of workshops, I am a HUGE advocate of learning all you can about your craft from more experienced photographers and teachers, and investing in that learning. Do not expect to come out of those classrooms, be they online or in person, with a "style." You may be influenced by your teacher, and fully capable of imitating their style, but your learning doesn't stop when the workshop is over. 

A Workshop should be a spring board, and walking out of one should only be your first step to greatness, it is not the final ingredient. Many people feel like ALL they need is to see someone work and then they will be amazing. Unfortunately this is not how it works, and why we get so frustrated sometimes. 

This image was taken after a workshop with Candice Zugich of The Blissful Maven. I learnt the lighting technique from her, and the freedom in letting unposed moments unfold. But this image has me all over it. It has my editing style, it has my love for the tiny sweetness of this little girl and the beautiful love that her mother had for her. (edited with ACR Preset Magic 2 from The Magic Look and True and Deep from Simply Dream (PS Actions) at 70% and 45% respectively)


If you have taken workshops and learned your technique you can stop looking elsewhere for guidance and start to look within. What is your why, what is your vision. You will find some amazingly beautiful photographs sit right there in your mind and your heart, just waiting for you to stop looking elsewhere for inspiration. And you will be amazed at what happens when you create something from your heart. 

Think of the first person who started to shoot for the shadow instead of the light, or the first person who put down the big chunky flower head band and picked up a thin dainty organic tieback for their newborn shoot. Or think of the person who opened up their aperture and found beautiful bokeh. I personally have NO CLUE who these people are, but they have influenced my photography, because they stopped doing what everyone else was doing, and tried something new, something that helped them convey their why, their vision. This is what I am saying you are capable of! Maybe it won't translate to a gazillion likes on Facebook, but it really could create growth and change, if not in the whole industry, definitely in your own work!

This is my most recent image, most recently edited, most recently shot. I see my mentors in this: Lisa from The Milky Way with her Illuminate and Beyond the Beanbag online courses, Rachel Vanoven with her Newborn eWorkshop, and Amy McDaniel of Dewdrops Photography with her in person workshop. But I also see me. I see me in the way I edit, in the colours I chose and in the connection I built with this baby and her parents throughout the session. I see my heart and my intention to make this child realize the incredible love and excitement her parents had in having her that they hired someone to capture her at this age. (edited with ACR Preset Bliss 5 from The Clean Look and Intensity from Simply Dream (PS Actions) at 35%)
 

A great example of innovation... taking the Cake Smash to somewhere completely new!!

Thank you to Jenna from Jenna Rae Photography! She is a fellow Illuminate Alumni, and this is a perfect example of going your own way and it being awesome!

YOU ARE AMAZINGLY CAPABLE OF CREATING IMAGES THAT MOVE PEOPLE. YOU HAVE THAT MAGIC. IT'S IN YOU! YOU JUST NEED TO STOP BEING THAT TROLL UNDER THE BRIDGE STOPPING YOU FROM REALIZING YOUR OWN TRUE GREATNESS!