
Getting Those Pesky Skin Tones Right!
/White Balance. When I started photography I didn't even know that white balance existed. Then the words "it looks a little cool" or "the skin is too blue" kept cropping up when I would look for some constructive criticism. I never saw what they saw until I started training my eyes. In this blog I am going to show you what technique I used to train my eyes to see correct white balance.
There are two times you can achieve proper white balance. One is in camera, which is probably the best time to do that, but if you are anything like me, white balance while shooting is not a priority. I can only seem to hold a few things in my mind while shooting: proper exposure, focusing on the subject, and achieving the beautiful photo, whether that is with connection, pose, lighting, composition... If I throw white balance into the mix I get way too overwhelmed, so I take care of white balance in post, while I am editing.
Now I am not one for eye-balling things when I am learning, and honestly until your eyes are properly trained to see proper skin-tones you shouldn't do any guessing when you are warming up skin. Sometimes you will end up with greenish orange skin, or purplish blue and it will frustrate you to no end. So when I found this technique I was SO happy. It is essentially a recipe, but also a jumping off point too. You can follow this recipe and then tweak it to better fit your image.
If this is your FIRST encounter with proper white balance, when you make these adjustments on your own images you may find them looking TOO warm. That's fine, grow into it and go slowly. But soon your eyes will adjust and eventually you will be able to leave this step behind and begin to guestimate the proper white balance.

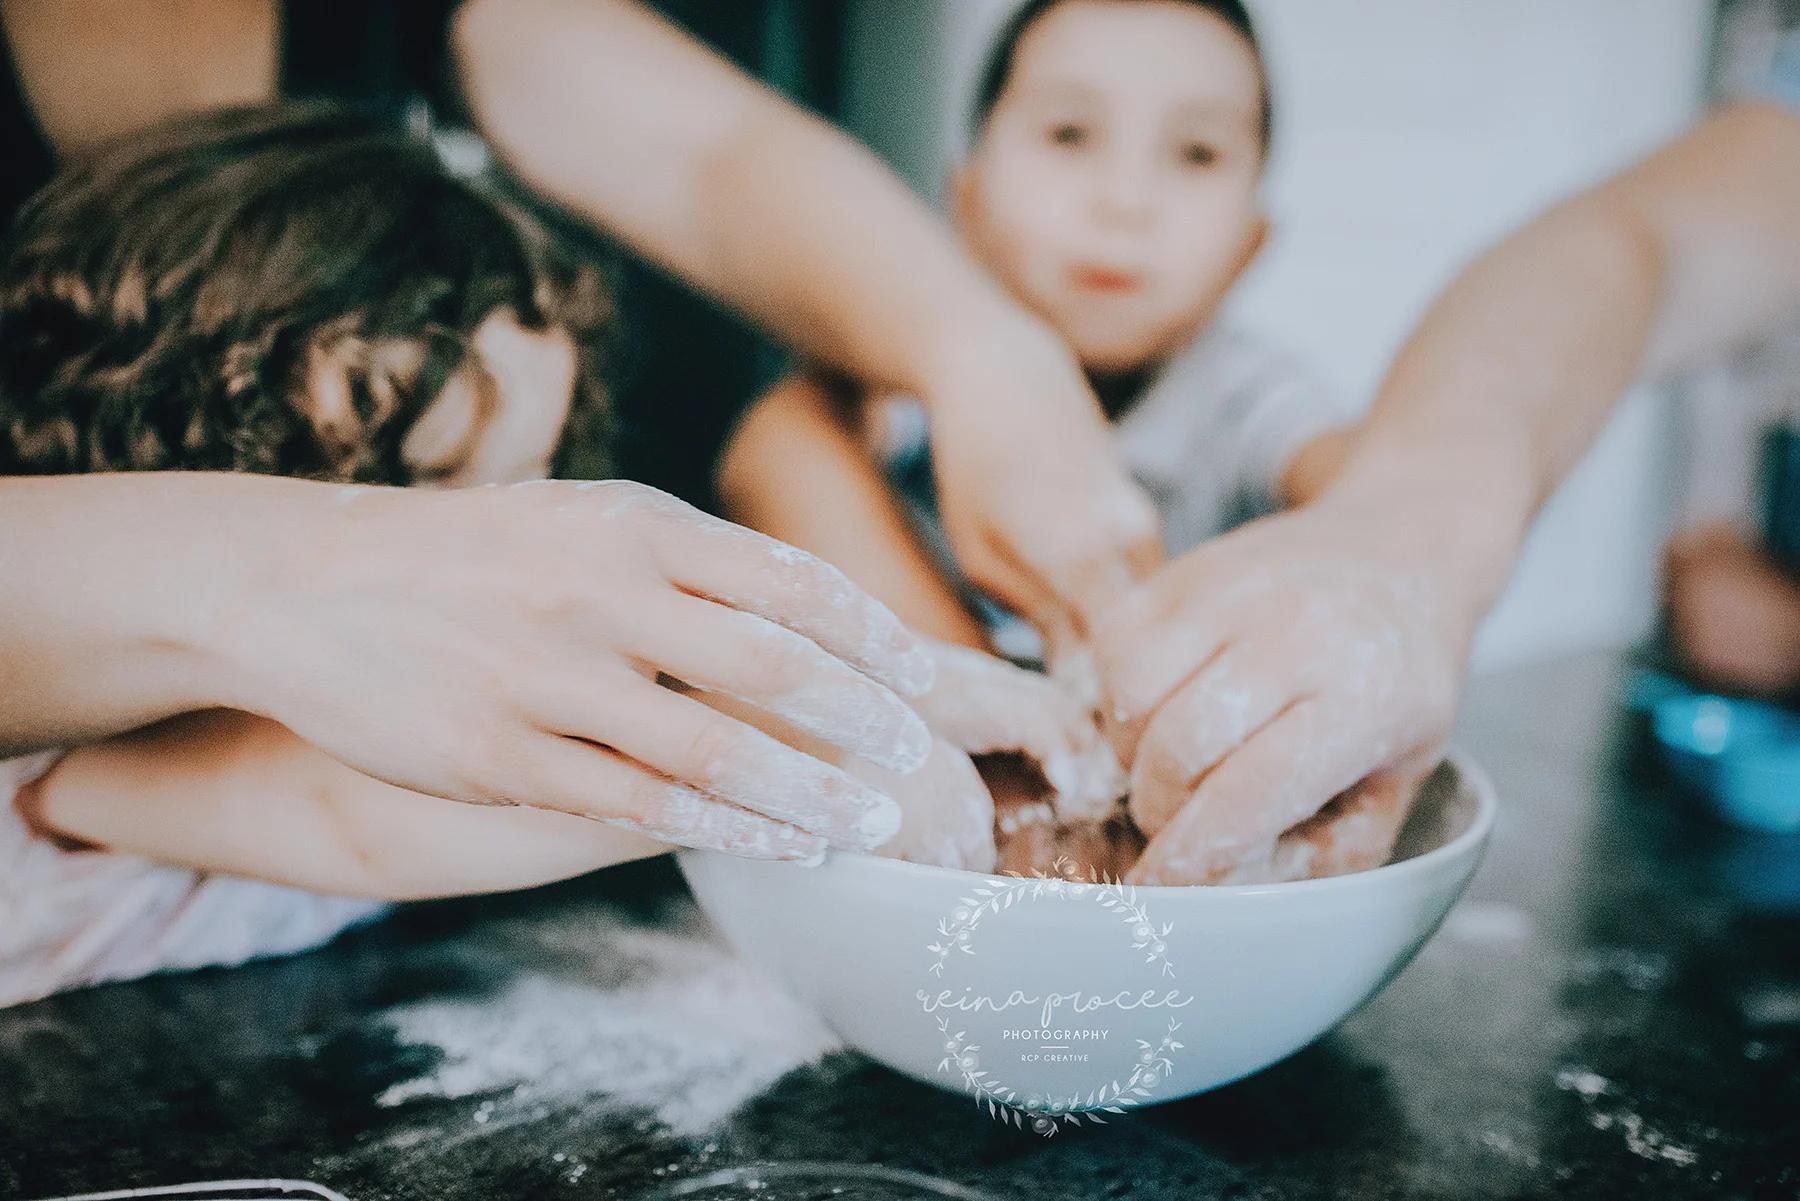
Image by Brittany Bennion Photography using "By The Fire" PS Action
Today I am going to show you how to correct skin tones using CMYK numbers!
Let's start by opening this beautiful image here by the very talented Amanda Laing of Amanda Laing Photography into Photoshop.

Seeing white balance on something that is white is the easiest way to see if you have it right. Looking at the blanket in the very top image of this blog, on the before image you can see the white parts of the blanket are blue, in this image you can see that the whites of her eyes have a blue tinge. So we know when whites are blue that the image is too cold. So lets get to work at warming it up!
To start, I am a firm believer of correcting your exposure before you correct white balance, I want to see what I am doing. To do this I go into the Adjustments panel and open up Levels and increase the midtones and deepen the shadows which brightens up the image a bit.

Once I have done that I will go into the tools panel on the left and select the eyedropper tool:

If you click your mouse on the eyedropper tool and hold it a drop down menu will show, select Color Sampler Tool.

Then I would click on a spot on her face that is right in the midtones area, so try to avoid upper forehead or cheekbones. I chose the space right at the top of the bridge of her nose.

When you click using the Color Sampler Tool it will open up the Info Panel which looks like this:

In the panel third down on the left, the one that says #1, that is the reading for your selection, but the reading is in RGB, so using the drop down menu (click on the eyedropper under the #1) and select CMYK.


Now here are our CMYK readings for the selection we made.
So at this point we should talk about what CMYK actually stands for. I have NO idea what K stands for :) haha, but C = Cyan, M = Magenta, and Y = Yellow. When you want to adjust these colors you need to know that they match up with three more colors. When you remove Cyan you actually add Red, when you remove Magenta you are adding Green, and finally removing Yellow actually means adding Blue. You will need to know this when you are making your corrections.
The recipe I was given when I started was confusing and I honestly had to write it down on a post-it and put it on my computer. I recommend you do this too :)
The recipe: Yellow should be slightly more than Magenta, and Cyan needs to be a third of Magenta.
As we know all skin tones are different, so you may need to use your own judgement, but the great thing about this recipe is that it sets you on the right path to finding the correct white balance.
Now back to our edit.
We know from our numbers above that we need to raise our Yellow, and lower our Cyan.

Go back to your Adjustments panel and choose Curves. It looks like this:
In Curves click on this button with the up and down arrow and hand - it will allow you to click and drag on the image to affect your selected curve.

I always try to start with the Yellows, I find that easier to see where I am going after the yellows have been adjusted.
So in the same Curves layer I will select the drop down menu that says RGB and start with Blue (remember Yellow is opposite of Blue), once I have selected Blue I will click again on the Color Sample I made on the image, and I will hold the click and drag up or down, dragging down will add more Yellow.

So now my numbers are showing Yellow a little more than Magenta which follows the recipe, but the Cyan is still really high and that needs to be closer to a third of Magenta, looking at the numbers I would say bringing the Cyan down to an 11 or 12 should work (Magenta is 34 here and 3 x 11 = 33 - I know, I know I hate math too... sorry!)
To lower my Cyan I select Red in my drop down menu in Curves and click on the sample area and drag up to add Red/lower Cyan.

Now that I have my Cyan down, my Magenta has gone up so I just need to make a third adjustment in Green, I select it in the drop down menu in Curves and click and drag up on the sample area in the image.

And that, my friends, is the correct skin tones and white balance for this image.


Side by side, this might look weird, it did to me when I first tried it. So stick with where you are comfortable. It's not the end of the world if you skin tones are a little cool :) we are artists in charge of our own canvases :) but using this method WILL train your eye to see proper skin-tones and if you are ever in a bind and unsure or your white balance, this will help you out in a pinch!
Today's freebie is an action I created for Photoshop CS5, 6 & CC that will help you warm up your images, make sure you use this action with cool images as it is meant to make your images warm - that's why I called it "By The Fire" Click here to download your FREE PHOTOSHOP ACTION here.
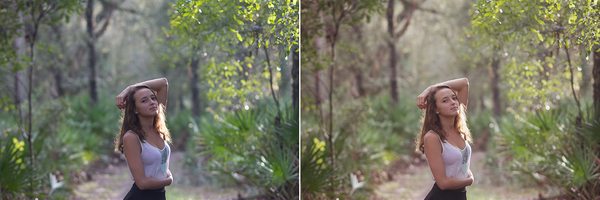
Image by C&D Photography edited with "By The Fire" PS Action
And, please, share this with your friends!
I hope this blog tutorial was helpful for you! If you would like a video version of this in the new year, comment on the blog to let me know :)