

Editing Your Pregnancy Progress Photos on your Phone! Montreal Maternity Photographer
/Capturing your pregnancy is such a fun and super interesting thing to do, especially in a beautiful city like Montreal. Not to mention your sweet baby will want to see this magical time when they grow up! But if you are anything like me, you want more than just the run-of-the-mill bathroom mirror selfie. Here I have compiled a step-by-step process in editing your images in a super pretty way using a phone app!
These pregnancy progress photos are perfect for during your pregnancy, but don’t forget if you’re planning on having your maternity session with me I normally do those between 32 and 36 weeks. So be sure to book yourself in to capture your radiant self on the cusp of a life changing moment in your life.
The most important thing I want you to remember is you need to be careful about the quality of light for these images. This image is backlit with natural light, you should really stick to taking your photos during the day in natural light to be super successful with this app (so turn off your house lights and stand near, in front of or facing a window).
Some cool ideas for locations of pregnancy progress photos:
- your backyard (do these in the evening when the sun is low in the sky so the lighting isn’t too harsh
- in front of one of the beautiful murals in downtown Montreal
- in front of a cute building in your neighbourhood
- in your living room, or in another well lit room with decor that you love
- in your local or favourite park
Posing tips:
- Always circle your belly, it shows a beautiful line, but it also shows how much you already have bonded with your sweet baby
- Stand in profile or slightly in profile so that the shape of your belly as it grows can be easily seen
- Bend one knee, I prefer the one closest to the camera, it creates a beautiful shape regardless of how big you start to feel
- I wouldn’t sit for these photos, the idea is to capture the progress of your baby’s growth inside of you, and you won’t easily see that progress if you aren’t standing in profile
Now that we have gotten the photography tips out of the way, here are my editing app tips!
My favourite app to use to edit my photos for social media is VSCO. I prefer this app because the filters they use are exact replicas to that beautiful vintage film look that I am so obsessed with!
Today I am just going to walk you quickly through how you can edit your phone images like I do, to get that timeless contrast and pop, while also giving it that beautiful aged look.
I will be showing you how to achieve this edit with the free version of the app, but if you are enjoying the app and want more control and access to more filters you may want to sign up for their monthly membership :) I definitely have haha!
Everything I show you will be available to you with the free version of the app.
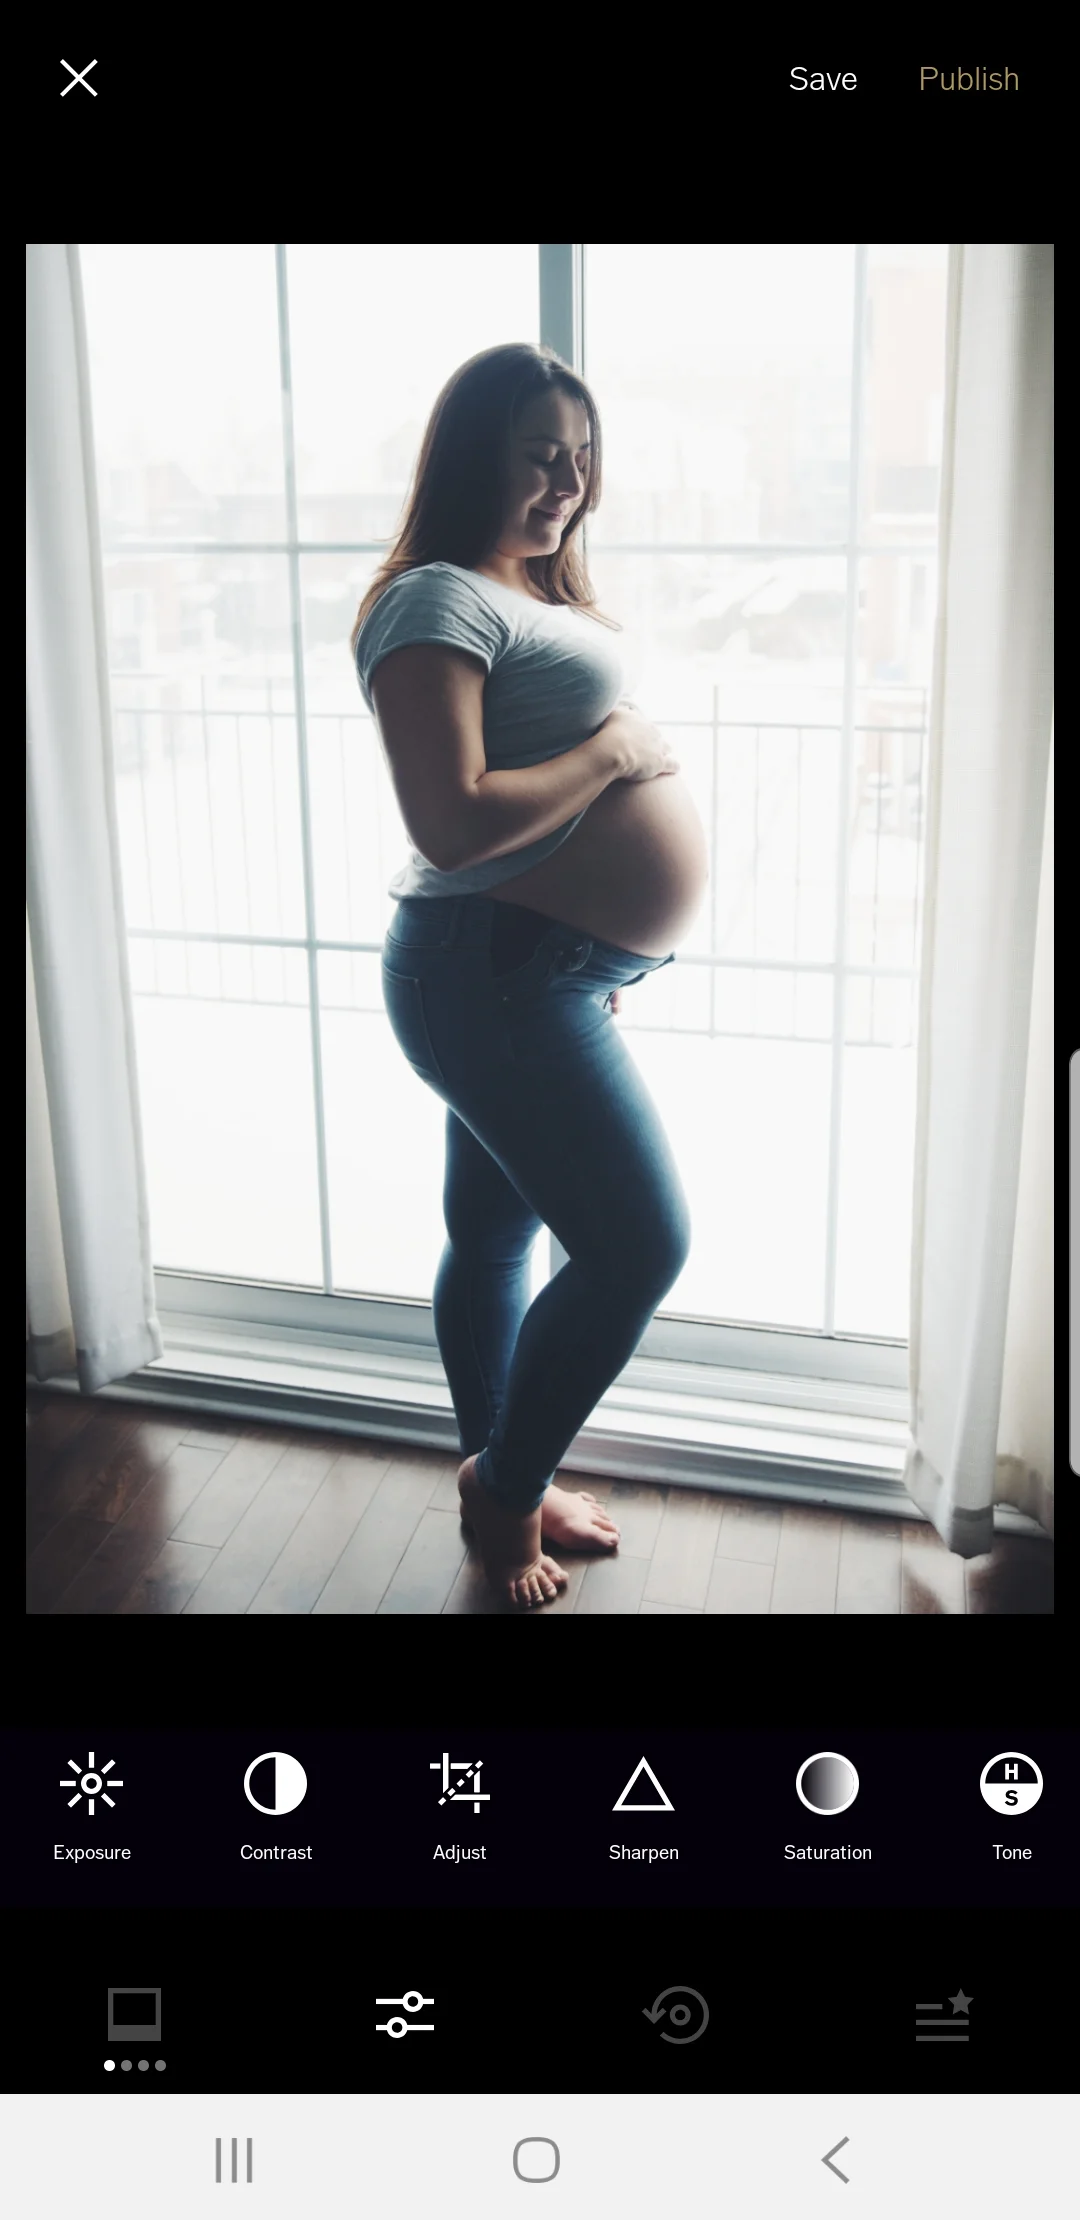
Step one: Import the image into VSCO


Step 2: Click on the round black circle in the right image in the images above. The round black circle is on the bottom right of your screen and has two lines with little circles on it.
Step 3: Choose the filter you prefer most. I chose the filter on the right hand side, if you want to reduce the effect of the filter, just keep pressing on the filter button (the one that says F2) and hold it there and it will change to a slider where you can lower the effect of the filter.


Step 4: In the filter screen you will see the symbols that look like a polaroid (the very left) the two lines with tiny circles again (left middle) a circle with an arrow circling around it (right middle) and a star with four lines (very right). I want you to click on the two lines with the tiny circles (left middle), this will give you access to more controls so that you can really refine your image!
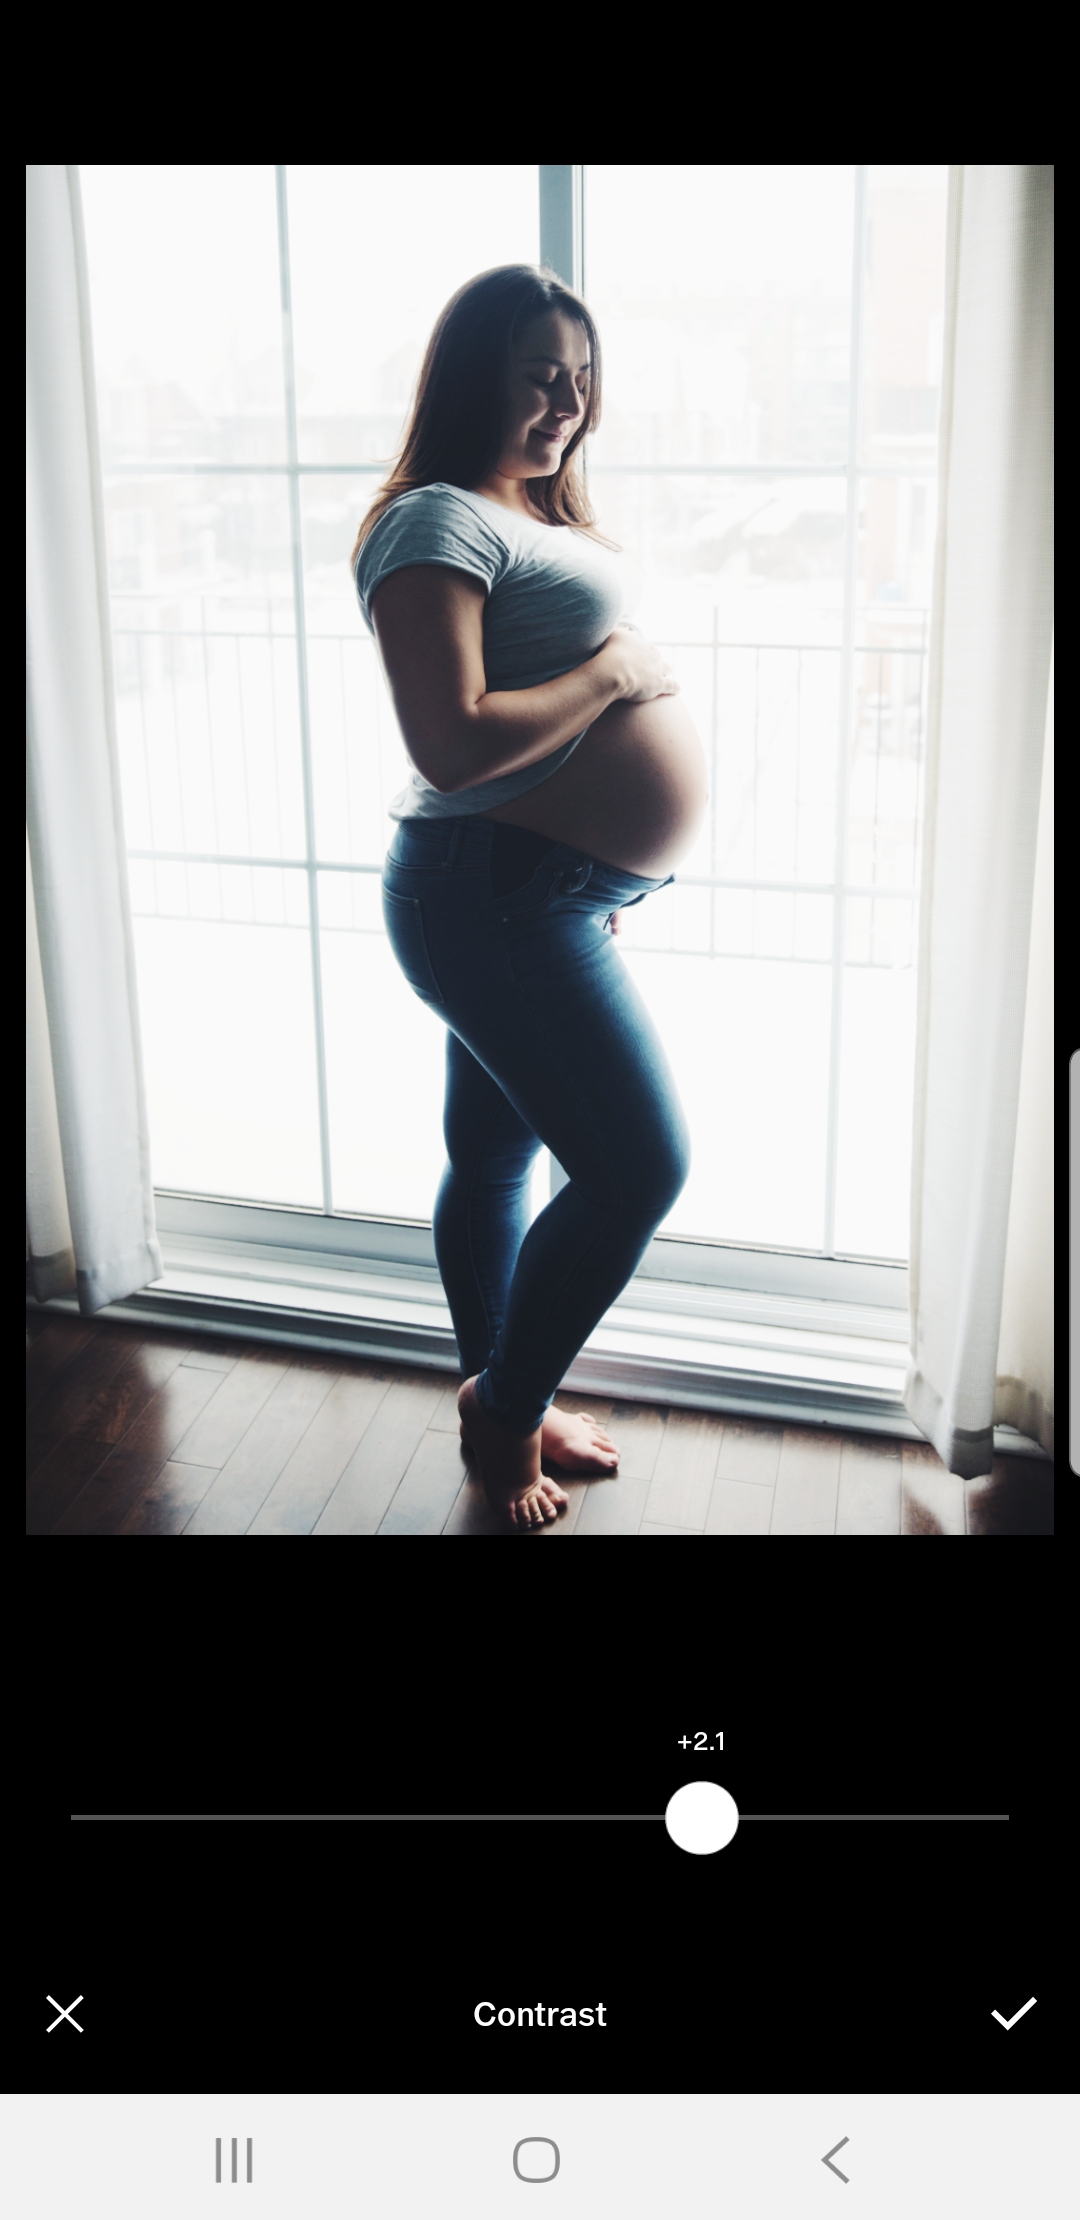
Step 5: I like to start with the contrast, start with small changes because too much contrast can really affect your image and make it look a little too harsh.
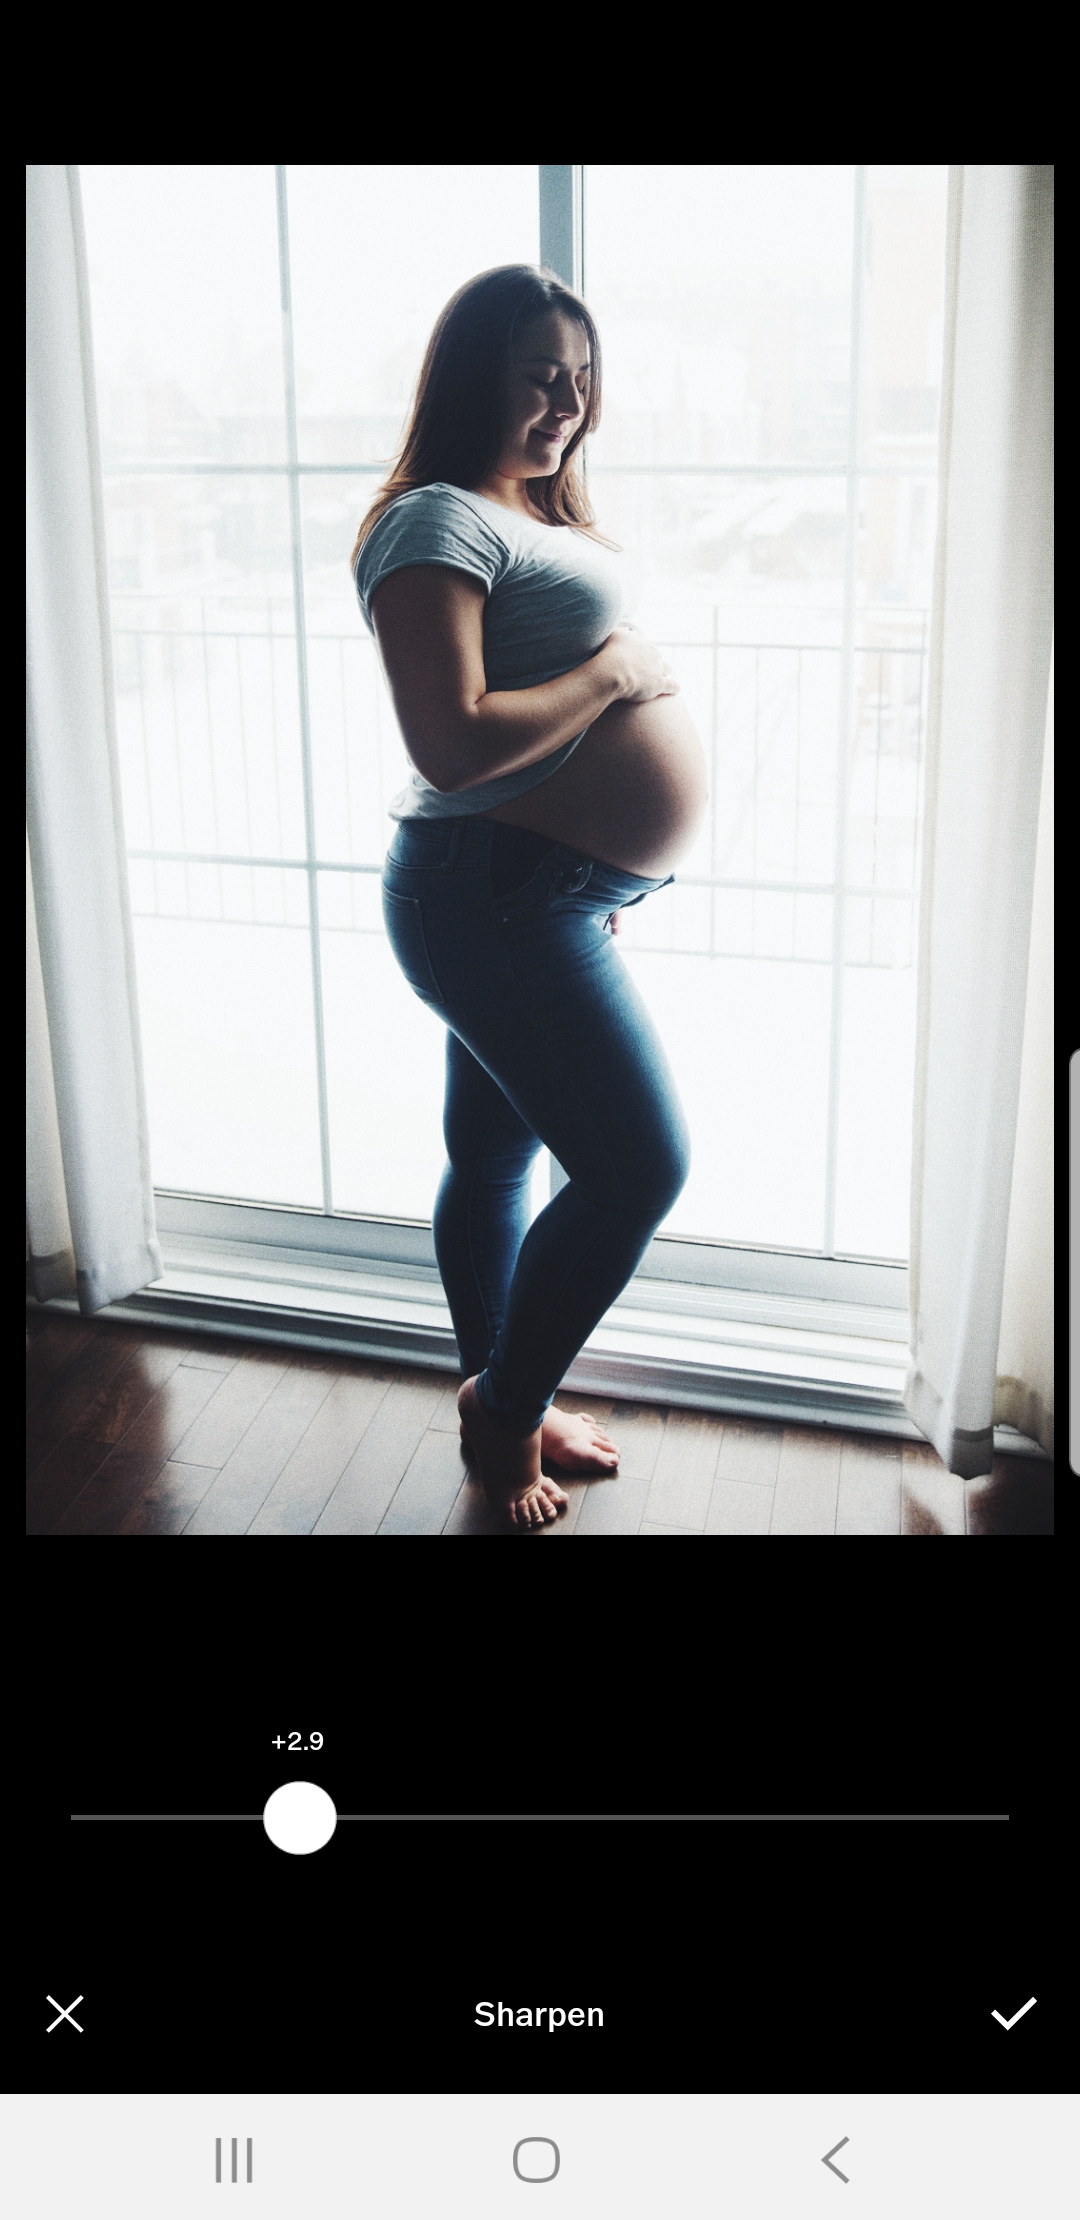
Step 6: I like to fiddle with adding some grain (this is an effect you often see with film photos, but I try to keep it on the lower end, so as to not ruin the photo) and the sharpen (again a little here goes a long way, but it is great for phone photos that can sometimes not be as sharp as we want them to be).

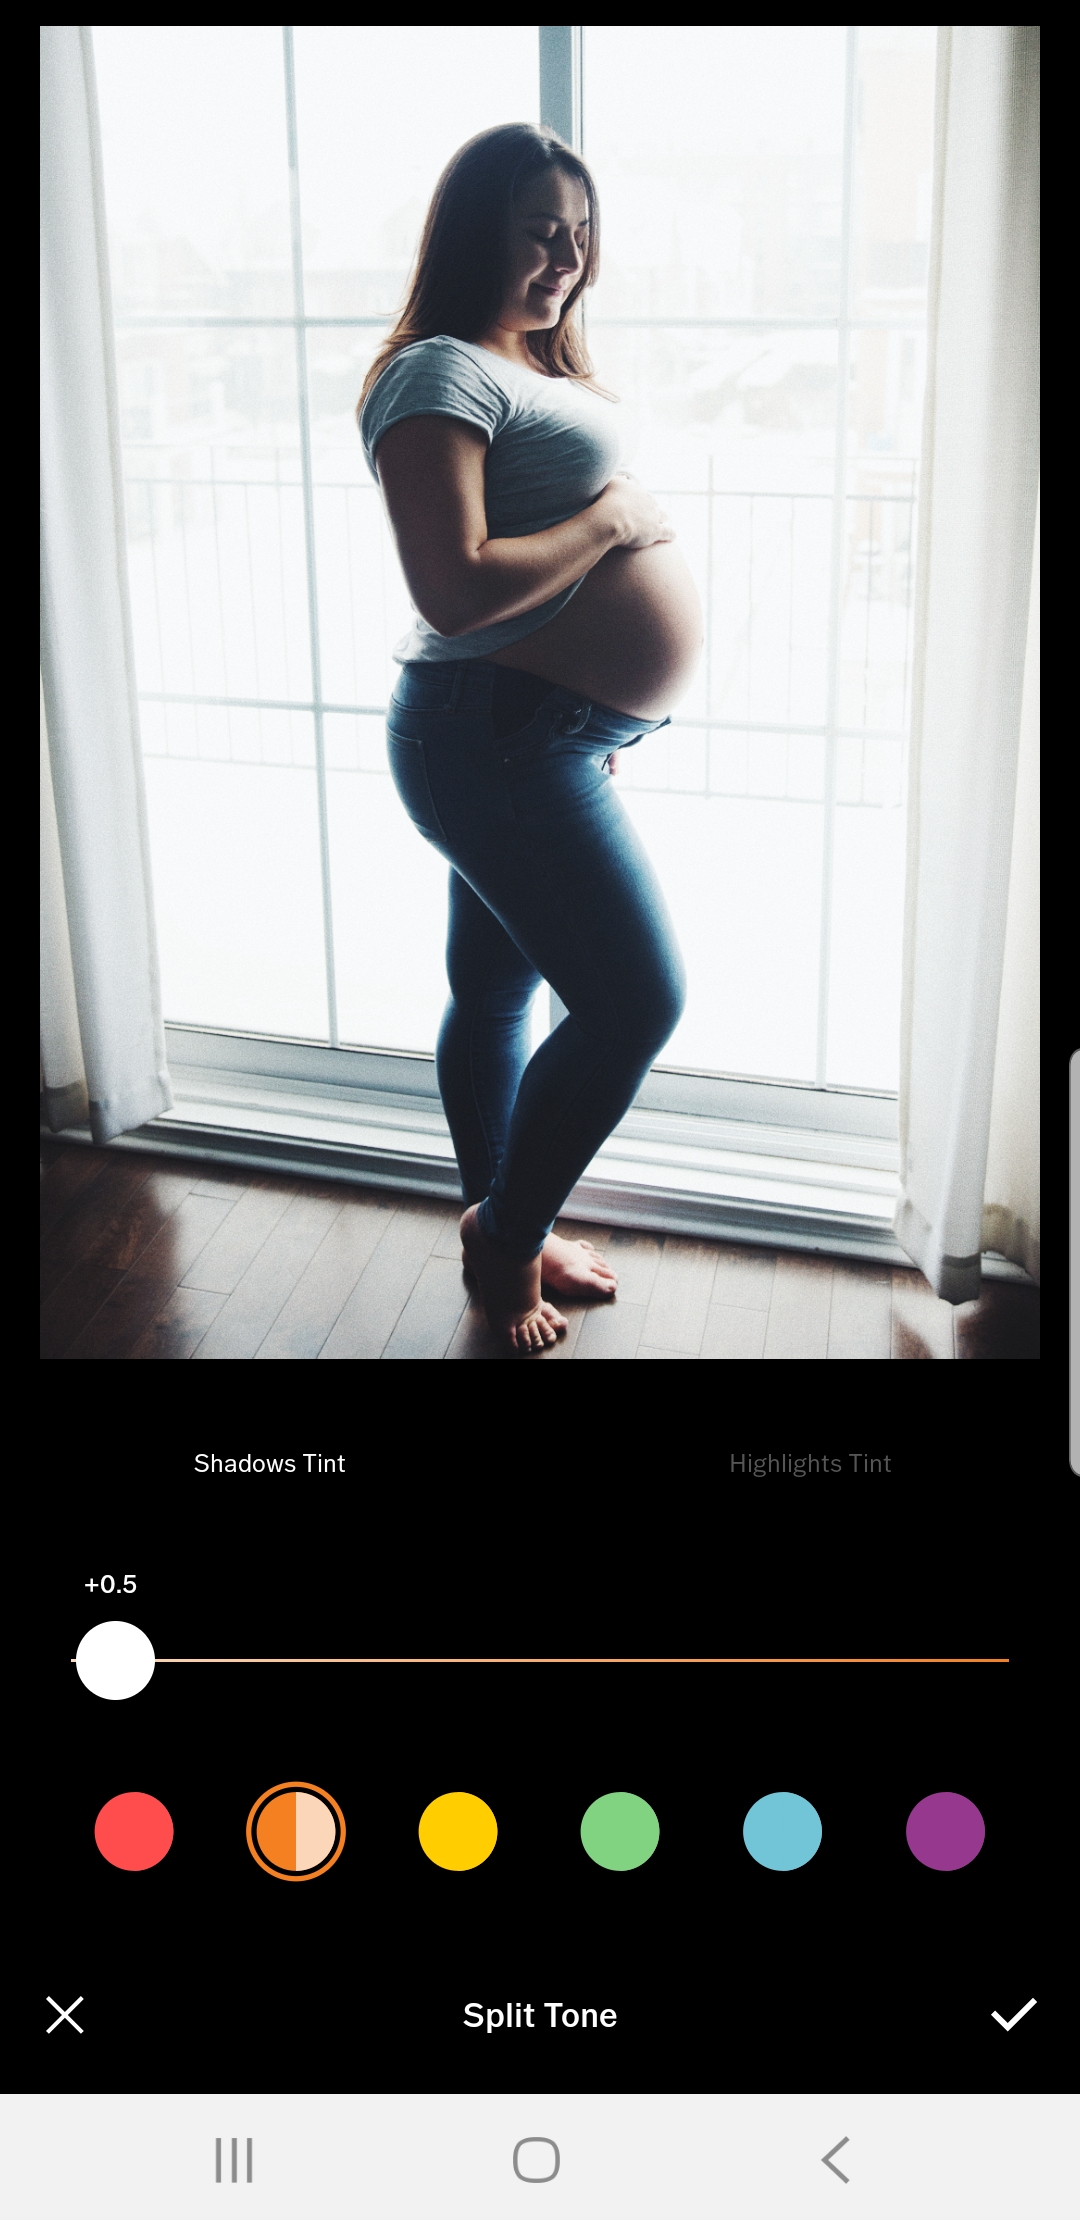
Step 7: I like to also add to the vintage look and feel by adding just a little bit of color to the shadows and highlights, this is called Split Toning. To see the changes that happen with this (to understand what it is doing) bring the slider up high, but do not forget to lower it a bit so that your affect isn’t too intense. Be sure to click on the check mark to apply the affect before you click over to the Highlights Tint.

Step 8: Click Save, do not click publish because it will publish your image onto a VSCO feed, so be sure to only click save. Depending on your phone there are different ways to save your image to your phone or share it with your Instagram, so I would research which method works for your phone <3
BONUS: Some of the black and white filters are absolutely beautiful so feel free to play around with one of those, you can add grain, sharpen, contrast and split tone these ones as well just like I did to the image below.

I truly hope you have so much fun capturing your pregnancy progress photos!
If you are looking for more information on whether you would like to book me for your maternity session please feel free to contact me! I book months in advance so please let me know your due date so I can be sure I can fit you into my schedule!